

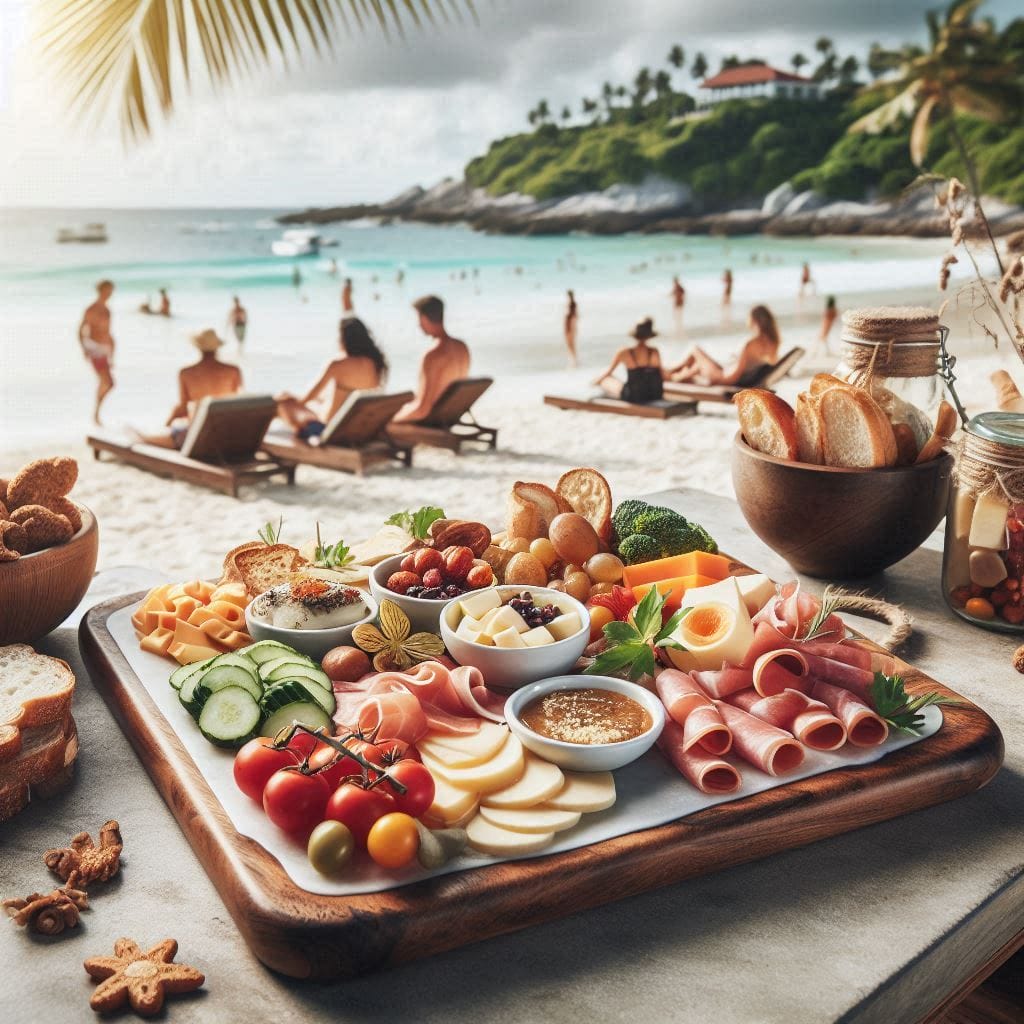
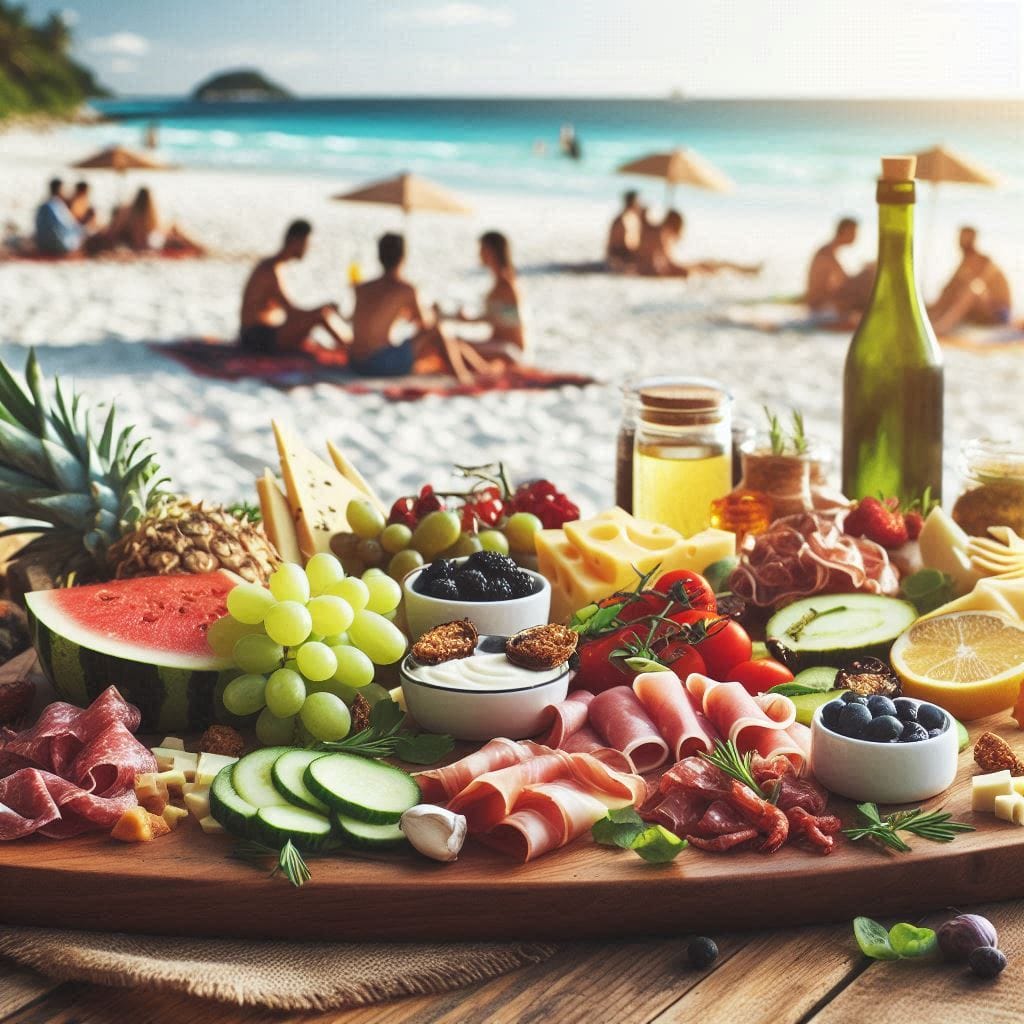
Summertime means spending long days at the beach, soaking up the sun, and enjoying refreshing dips in the ocean. But what’s a beach day without some delicious snacks to share with your friends or family? Enter the beach charcuterie board, a trendy and creative way to pack all your favourite bites into one portable, Instagram-worthy display. Whether you’re planning a picnic on the sand or a backyard barbecue, a beach charcuterie board is the perfect way to satisfy everyone’s cravings while adding a touch of style to your gathering. In this article, we’ll show you how to create the ultimate beach charcuterie board that’s both delicious and visually stunning, with tips, tricks, and inspiration to help you get started.
TIP: Dive into charcuterie mastery with immediate access to a community of 514K professionals. Click here and start transforming your gatherings today!
tacTable of Contents [CLICK HERE TO OPEN]
- What is a Beach Charcuterie Board?
- Ingredients for a Beach Charcuterie Board
- Essential Equipment and Utensils for Beach Charcuterie
- Building Your Beach Charcuterie Board
- Tips for Serving Beach Charcuterie
- How to Make a Beach Charcuterie Tackle Box
- Drinks to Pair with Your Beach Charcuterie Board
- Tips for Transporting Your Beach Charcuterie Board
- Creative Presentation Ideas for Beach Charcuterie
- Wrapping It Up
- Frequently Asked Questions
What is a Beach Charcuterie Board?
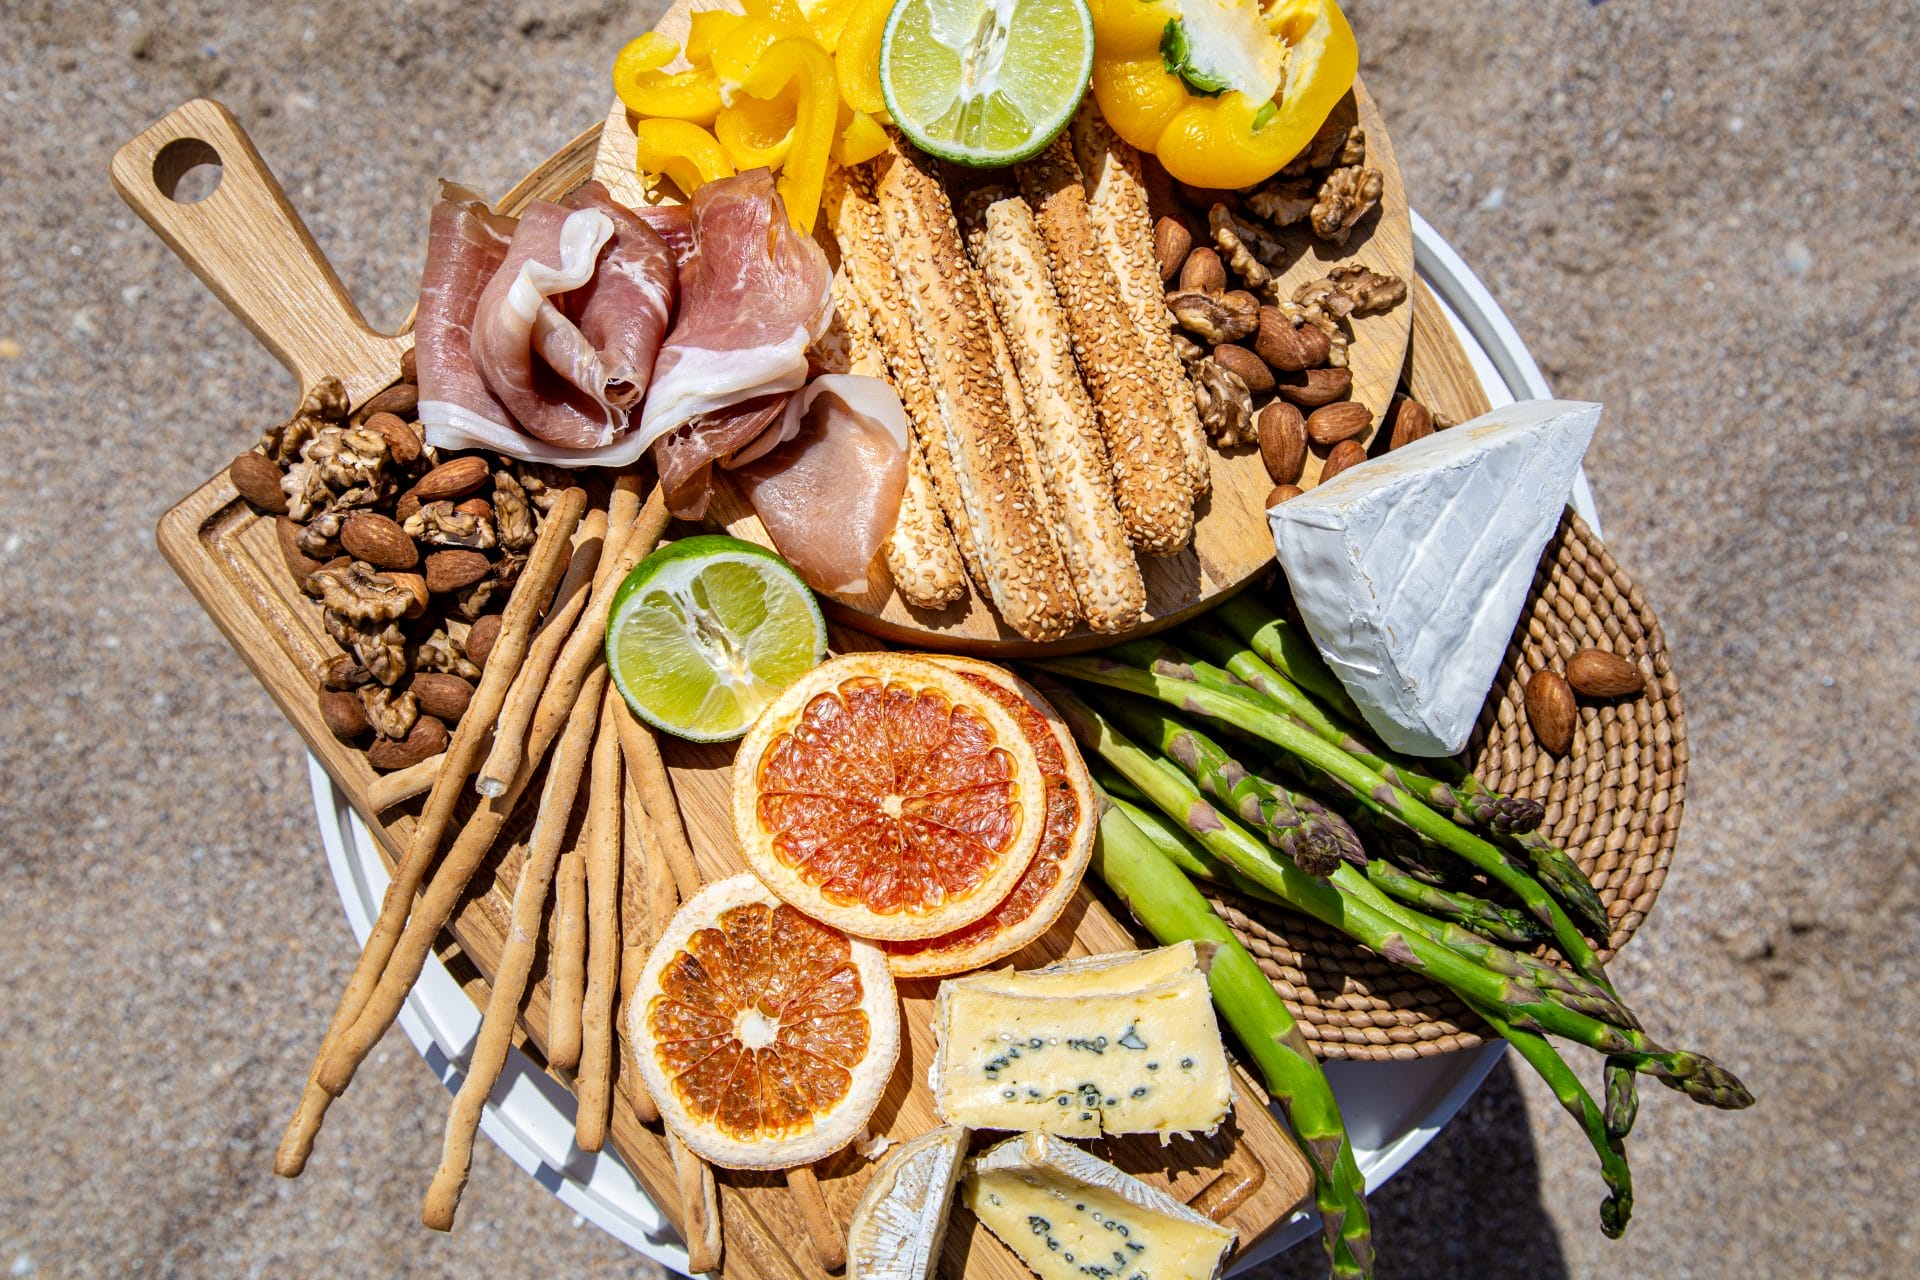
A charcuterie board, in its essence, is a carefully curated platter of cured meats, cheeses, fruits, nuts, and other delectable bites that are arranged to create a visually appealing and delicious spread. It’s a delightful way to indulge in a variety of flavors and textures all in one place.
Now, let’s dive into the exciting world of beach charcuterie boards. What sets them apart from traditional charcuterie boards is their focus on portability and convenience. While a traditional charcuterie board is typically enjoyed in a more formal setting, a beach charcuterie board is designed to be easily transported and enjoyed while lounging on the sand or frolicking in the waves.
The key difference lies in the selection of snacks that make up a beach charcuterie board. Since you’ll be enjoying it outdoors, it’s important to choose items that can withstand the heat and remain fresh throughout the day. Think of beach-friendly snacks like bite-sized sandwiches, wraps, or skewers. Fresh and juicy fruits like grapes, watermelon, and pineapple are not only refreshing but also provide a tropical touch. Crackers, breadsticks, or pretzels add a satisfying crunch, while small containers of dips like hummus or guacamole are perfect for dipping on the go.
Delicious Yet Practical
By incorporating these portable snacks and carefully selecting items that won’t wilt, melt, or spoil easily, you can create a beach charcuterie board that is both visually stunning and practical. It’s all about curating a selection of treats that will keep your taste buds satisfied while you soak up the sun and enjoy the salty breeze.
Remember, the beauty of a beach charcuterie board is its versatility. You have the freedom to customize it based on your preferences and the tastes of your fellow beachgoers. Whether you’re craving savory or sweet, there are endless possibilities to explore. Let your imagination run wild and create a beach charcuterie board that will make your seaside experience even more memorable.
Ingredients for a Beach Charcuterie Board
When it comes to beach charcuterie, selecting the right ingredients is key to ensuring a delightful seaside dining experience. As you prepare to embark on your beach adventure, consider the following factors when choosing your beach-friendly ingredients:
1. Portability:
Opt for ingredients that are easy to transport and won’t require refrigeration or careful handling. Choose sturdy cheeses, cured meats, and dried fruits that can withstand the journey to the beach without losing their flavor or texture.
2. Heat Resistance:
Given the sun’s relentless rays, it’s essential to choose ingredients that won’t spoil or melt in the heat. Look for cheeses and meats that are less prone to melting or sweating, such as aged cheeses, hard salamis, and air-dried meats like prosciutto or beef jerky.
3. Freshness:
While some ingredients are more resilient to heat than others, it’s still important to prioritize freshness when selecting your beach charcuterie ingredients. Choose ripe fruits, crisp vegetables, and high-quality cheeses and meats to ensure a flavorful and satisfying spread.
4. Beach-Friendly Pairings:
Consider the beach environment when pairing your charcuterie ingredients. Opt for light and refreshing flavors that complement the seaside setting, such as citrusy fruits, briny olives, and tangy pickles. Incorporate beach-inspired elements like seaweed snacks, smoked seafood, and tropical fruits to add a coastal flair to your charcuterie board.
5. Dietary Considerations:
Take into account any dietary restrictions or preferences of your fellow beachgoers when selecting your charcuterie ingredients. Offer a variety of options to accommodate different tastes and dietary needs, including vegetarian, gluten-free, and dairy-free choices.
By carefully selecting beach-friendly ingredients for your charcuterie board, you can create a seaside culinary escape that’s as refreshing as a dip in the ocean and as satisfying as a day well spent under the sun. So pack your cooler, grab your beach blanket, and let the flavors of the coast transport you to a culinary paradise by the sea.
Curate Your Coastal Culinary Palette
Choosing the right ingredients is essential when preparing a beach charcuterie spread that not only tantalizes the taste buds but also withstands the sun, sand, and salty breeze. Here’s a guide to selecting beach-friendly ingredients that are easy to transport, won’t spoil in the heat, and pair perfectly with the seaside setting:
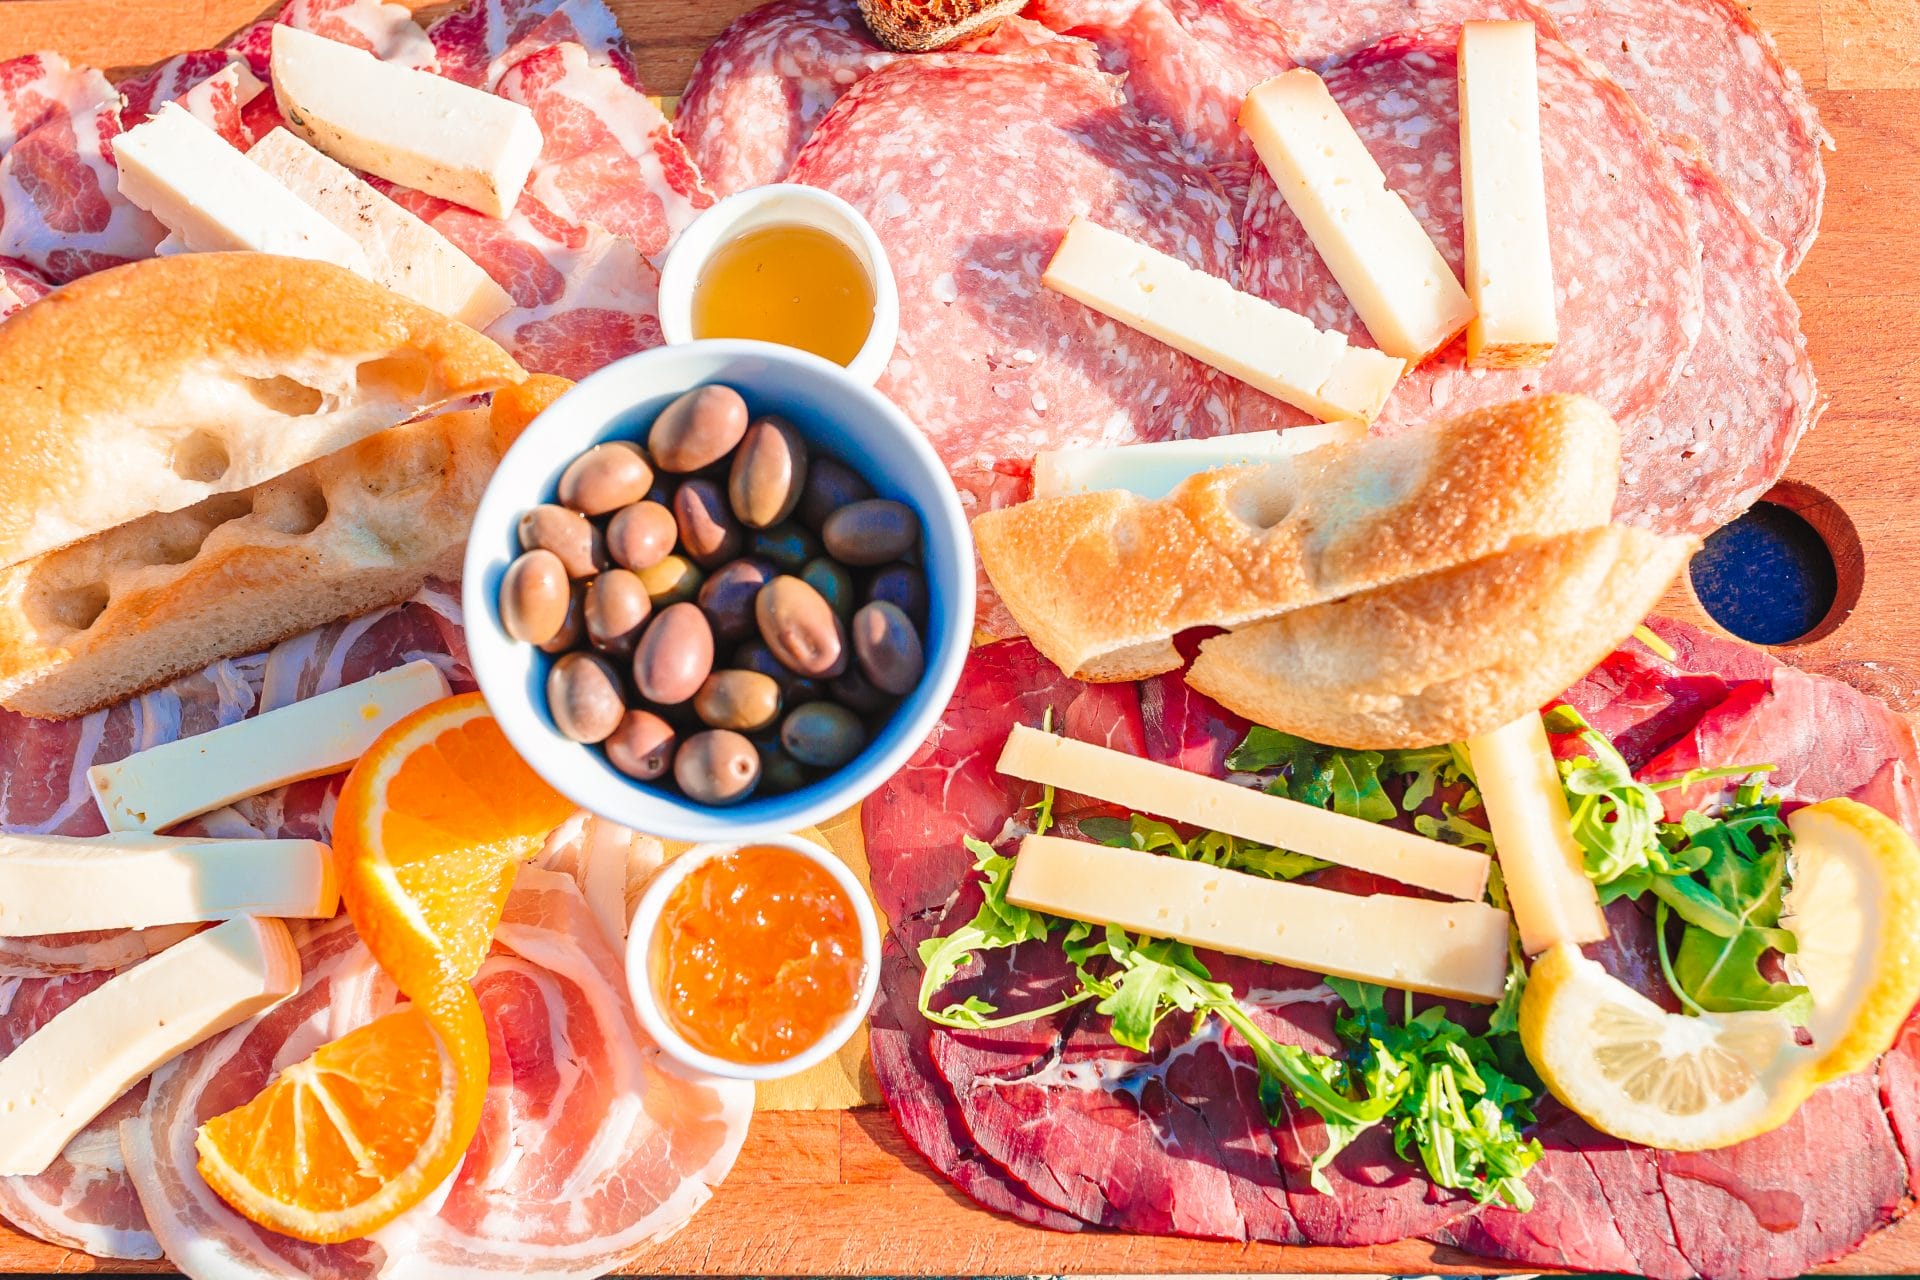
1. Cured Meats:
- Opt for cured meats like salami, prosciutto, and pepperoni that don’t require refrigeration and are easy to transport in a cooler or insulated bag. These savory delights add depth of flavor to your beach charcuterie spread and pair well with a variety of cheeses and accompaniments.
2. Hard Cheeses:
- Choose hard cheeses like aged cheddar, Parmesan, and Gouda that can withstand warm temperatures without melting or spoiling. Slice or cube the cheeses before heading to the beach for easy serving and enjoy their rich and nutty flavors alongside your favorite charcuterie meats.
3. Fresh Fruits:
- Include a selection of fresh fruits that are hydrating, refreshing, and bursting with flavor. Opt for portable options like grapes, berries, melon slices, and citrus wedges that are easy to transport and enjoy on the go. These vibrant fruits add a pop of color and sweetness to your beach charcuterie spread.
4. Dried Fruits and Nuts:
- Pack a variety of dried fruits and nuts for a satisfying crunch and natural sweetness. Choose options like apricots, figs, almonds, and pistachios that are easy to snack on and provide a boost of energy for long days at the beach. Mix and match different combinations for a dynamic flavor profile.
5. Crispy Crackers and Breadsticks:
- Select crispy crackers and breadsticks that won’t become soggy in the heat and are sturdy enough to hold up to hearty dips and spreads. Look for options like whole grain crackers, rice cakes, or breadsticks with seeds and herbs for added texture and flavor.
6. Gourmet Spreads and Dips:
- Pack a variety of gourmet spreads and dips to accompany your charcuterie meats and cheeses. Choose options like hummus, tapenade, mustard, or fruit preserves that are easy to transport and offer a burst of flavor with every bite.
By selecting beach-friendly ingredients that are easy to transport, won’t spoil in the heat, and pair well with the seaside environment, you can create a beach charcuterie spread that’s as delightful as it is delicious. So pack your cooler, grab your beach blanket, and prepare to indulge in the flavors of the coast with family and friends.
Essential Equipment and Utensils for Beach Charcuterie
Enhancing Your Coastal Dining Experience
When it comes to beach charcuterie, having the right equipment and utensils can make all the difference in creating a memorable seaside spread. Here are some recommendations for portable serving boards, utensils, and containers that are ideal for beach picnics and won’t take up too much space in your beach bag:
1. Portable Serving Boards:
- Opt for lightweight and durable serving boards that are easy to transport and won’t be affected by sand or moisture. Consider using bamboo or plastic cutting boards, which are sturdy and easy to clean, or invest in collapsible silicone serving trays that can be folded up for compact storage.
2. Utensils:
- Pack a set of multi-purpose utensils that can be used for slicing, spreading, and serving your charcuterie ingredients. Choose utensils made of stainless steel or bamboo, which are resistant to rust and corrosion, and consider bringing along a small knife sharpener to keep your blades sharp throughout the day.
3. Containers:
- Use airtight containers or resealable bags to store perishable ingredients like cheeses, meats, and fruits, and keep them cool and fresh in your cooler or insulated picnic bag. Opt for stackable containers with secure lids to prevent leaks and spills, and choose lightweight options that won’t weigh you down as you make your way to the beach.
4. Cooler or Insulated Bag:
- Invest in a high-quality cooler or insulated picnic bag to keep your charcuterie ingredients cool and fresh during transportation. Look for models with thick insulation and leak-proof lining to ensure that your food stays at a safe temperature, even on the hottest of beach days.
5. Reusable Plates and Utensils:
- Consider bringing along reusable plates, cups, and utensils to minimize waste and reduce your environmental impact. Opt for lightweight and durable options made of bamboo or stainless steel, and pack them in a reusable tote bag or backpack for easy transport to and from the beach.
With these essential equipment and utensils in tow, you’ll be well-equipped to create a beach charcuterie spread that’s as convenient to prepare as it is delicious to enjoy. So grab your gear, head to the shore, and let the flavors of the coast transport you to a culinary paradise by the sea.
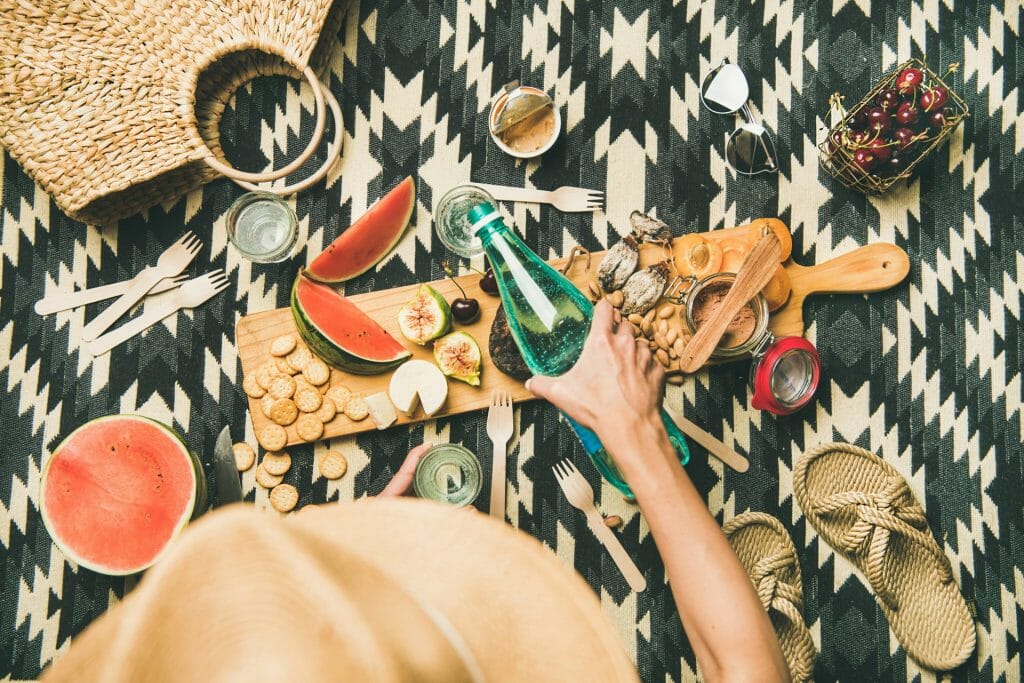
Building Your Beach Charcuterie Board
Crafting a Coastal Culinary Masterpiece
Creating a beach charcuterie board is not just about arranging ingredients; it’s about curating a sensory experience that captures the essence of seaside living. Here’s a step-by-step guide to assembling a beach charcuterie board that will withstand the elements and stay fresh under the sun:
1. Start with a Sturdy Base:
- Choose a portable serving board or tray that can withstand the beach environment. Opt for materials like bamboo, plastic, or silicone that are lightweight, durable, and easy to clean. Avoid porous materials like wood that may absorb moisture and harbor bacteria.
2. Arrange Ingredients Strategically:
- Begin by placing larger items like cheeses, meats, and fruits on the board, spacing them out evenly to create visual interest. Consider using ramekins or small containers to separate wet or messy ingredients like dips or spreads.
3. Layer with Texture and Flavor:
- Add layers of texture and flavor by incorporating a variety of ingredients, such as crunchy nuts, crispy crackers, and briny olives. Mix and match flavors and textures to create a balanced and satisfying spread that appeals to all tastes.
4. Mindful of Melting:
- Be mindful of ingredients that may melt or become soggy in the sun, such as soft cheeses, chocolate, or delicate spreads. If including these items, place them in the shade or use insulated containers to keep them cool and prevent them from melting.
5. Garnish with Freshness:
- Garnish your beach charcuterie board with fresh herbs, edible flowers, or citrus slices to add a pop of color and freshness. Consider incorporating beach-inspired elements like seaweed snacks, smoked seafood, or tropical fruits to enhance the coastal theme.
6. Pack with Care:
- Once assembled, pack your beach charcuterie board in a cooler or insulated bag with ice packs to keep it cool and fresh during transportation. Avoid leaving the board in direct sunlight for extended periods to prevent ingredients from spoiling or melting.
7. Enjoy Responsibly:
- When enjoying your beach charcuterie board, be mindful of food safety guidelines and avoid leaving perishable items out in the sun for too long. Enjoy your culinary creation in moderation, savoring each bite as you soak up the sun and sea breeze.
With these step-by-step instructions, you’ll be well-equipped to assemble a beach charcuterie board that’s as visually stunning as it is deliciously satisfying. So gather your ingredients, pack your board, and head to the beach for a culinary adventure unlike any other.
Tips for Serving Beach Charcuterie
Enjoying Savory Delights by the Seashore
Serving charcuterie on the beach can be a delightful experience, but it requires a bit of preparation to ensure that your spread stays fresh and enjoyable amidst the sand and sea breeze. Here are some tips for serving beach charcuterie and ensuring a hassle-free dining experience:
1. Keep it Cool:
- Use a cooler or insulated bag with ice packs to keep your charcuterie ingredients cool and fresh during transportation. Pack perishable items like cheeses, meats, and dips in airtight containers to prevent them from spoiling in the sun.
2. Shade is Your Friend:
- Set up your beach charcuterie spread in a shaded area to protect it from direct sunlight and minimize the risk of ingredients melting or spoiling. Use a beach umbrella, canopy, or tent to create a shaded oasis where you can relax and enjoy your culinary creations.
3. Elevate Your Spread:
- Place your serving board or tray on a raised surface like a picnic table, cooler, or beach chair to elevate it above the sand and keep it away from any potential debris or critters. Consider bringing along a small folding table or portable serving stand for added convenience.
4. Windproof Your Spread:
- Use small bowls or ramekins to contain loose ingredients like nuts, olives, or dips and prevent them from blowing away in the wind. Consider placing heavier items like cheese blocks or fruit clusters strategically around the board to anchor it down and prevent it from tipping over.
5. Serve Single-Serve Portions:
- Consider portioning out individual servings of charcuterie onto small plates or napkins to minimize handling and prevent cross-contamination. This not only makes it easier for guests to enjoy the spread but also reduces the risk of foodborne illness in outdoor settings.
6. Pack Plenty of Extras:
- Don’t forget to bring along plenty of extras like napkins, utensils, and wet wipes for easy cleanup and hygiene. Consider packing a small trash bag or container to collect any waste and keep your beach area tidy throughout the day.
By following these tips for serving beach charcuterie, you can create a memorable dining experience that’s as enjoyable as it is hassle-free. So pack your cooler, set up your shade, and prepare to indulge in savory delights by the seashore with family and friends.
How to Make a Beach Charcuterie Tackle Box
Looking for a unique way to present your summer beach charcuterie board? Consider making a charcuterie tackle box! This fun and creative presentation is perfect for outdoor picnics, beach trips, or any summer gathering. In this section, we’ll share some tips and tricks for making your own beach charcuterie tackle box.
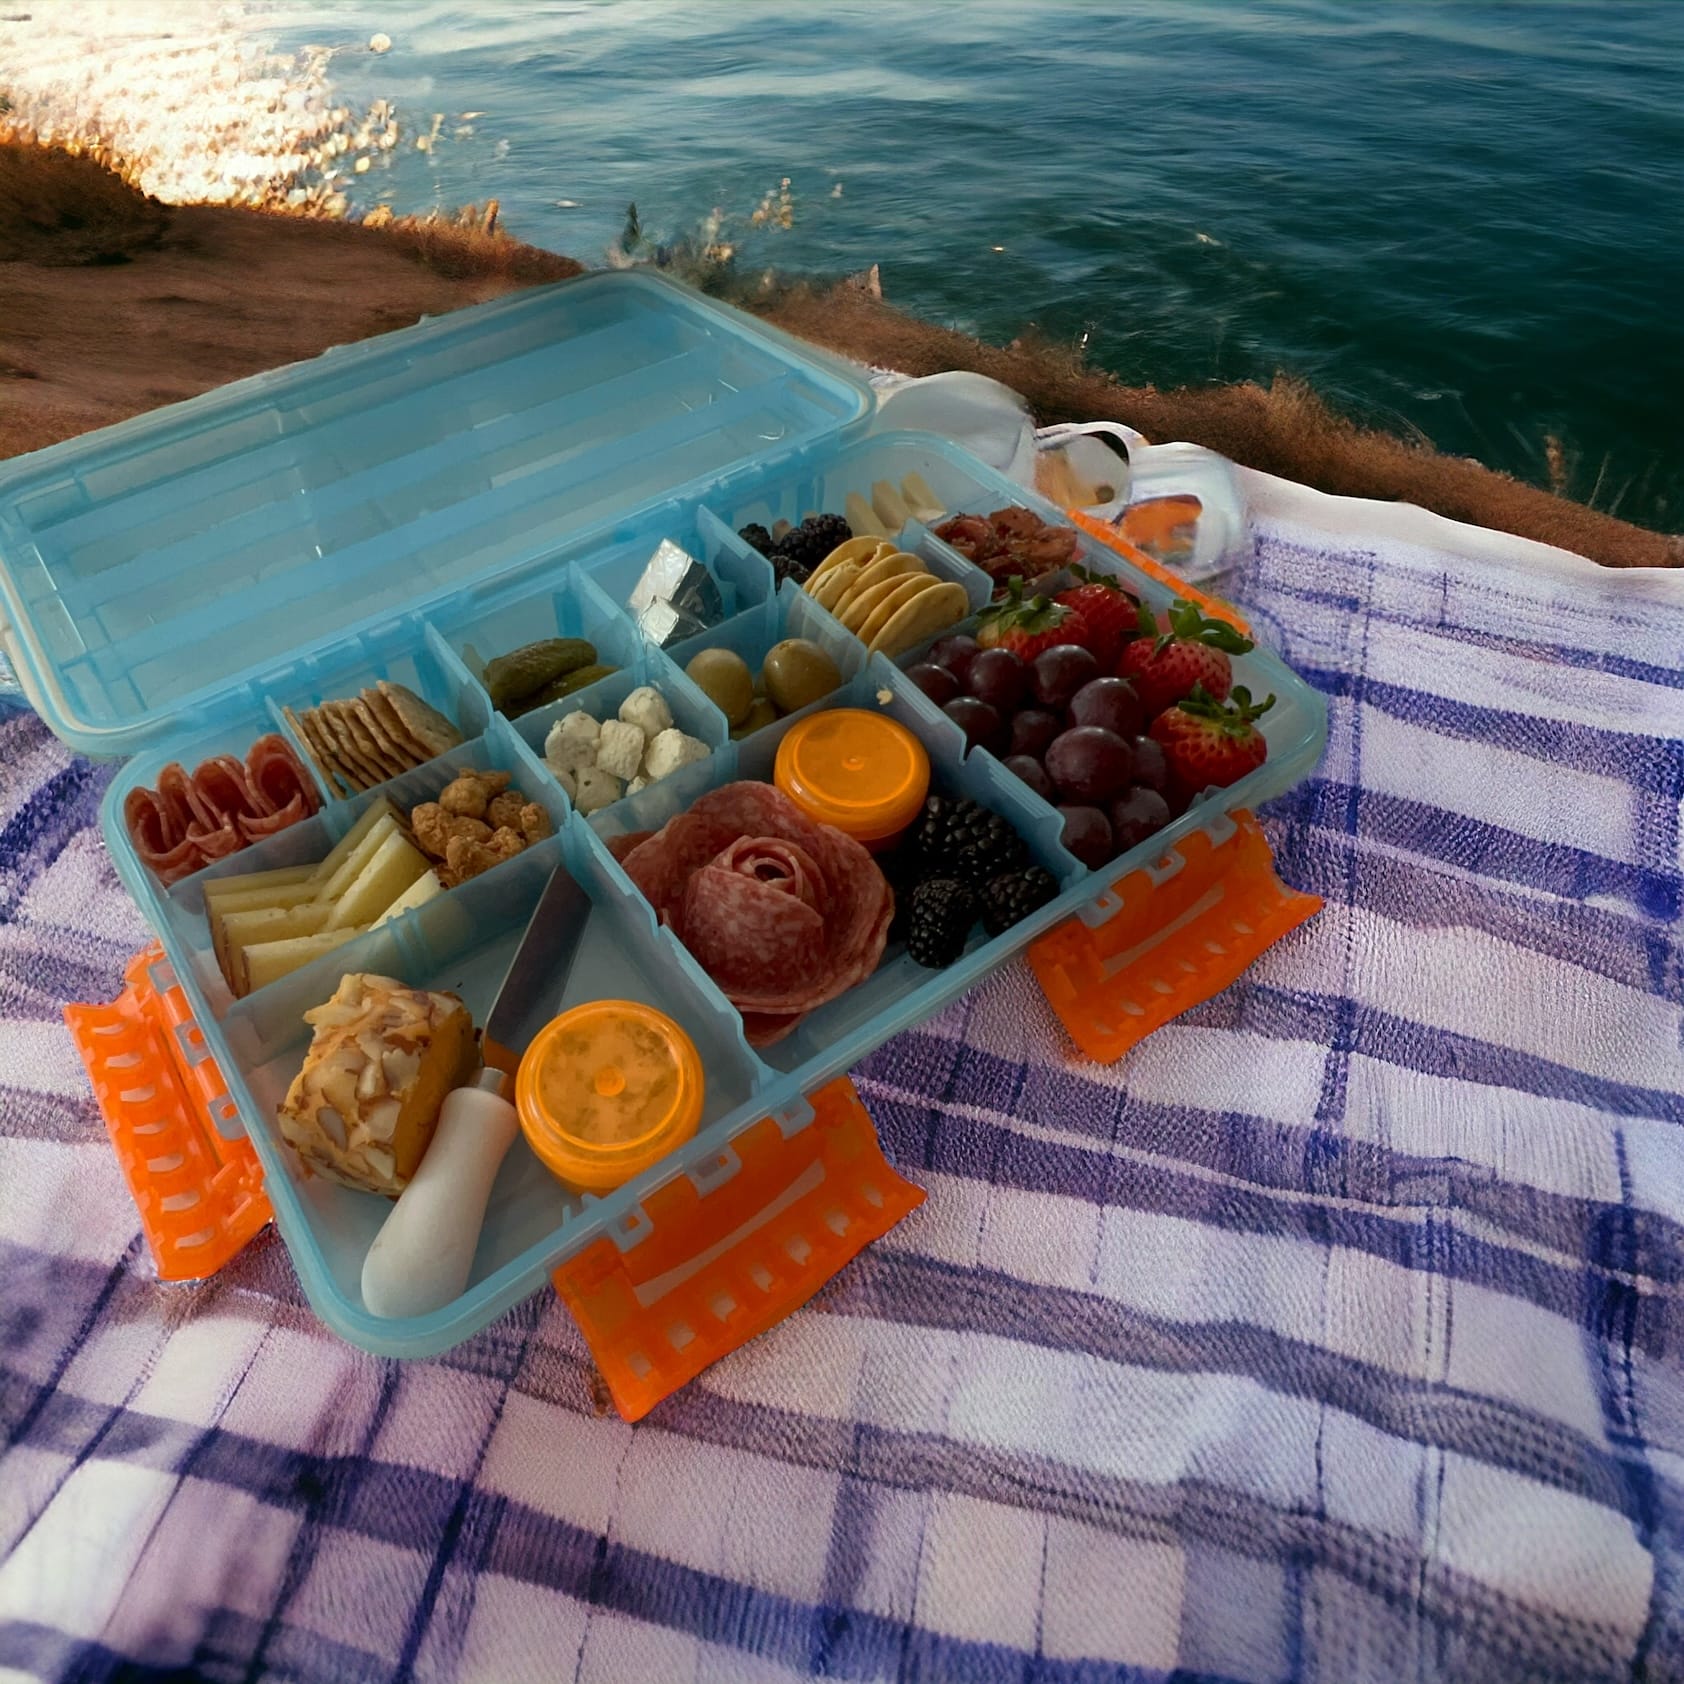
Step 1: Choose Your Tackle Box
The first step in making a charcuterie tackle box is to find the perfect container. You can use an actual tackle box, which can be found at sporting goods stores or online. Alternatively, you can use a clear plastic container with multiple compartments, such as a craft organizer or a bead storage box.
We recommend using something food safe like Subsafe’s Charcuterie Safe: Snack Set For On The Go! This travel-friendly, all-in-one kit is designed to keep your charcuterie fresh and secure wherever life takes you, featuring a waterproof design, versatile compartments, and convenient accessories for hassle-free snacking on the move. Check it out here >>
Step 2: Select Your Ingredients
Next, choose your ingredients. When making a charcuterie tackle box, it’s important to select foods that are easy to eat and won’t spoil quickly in the heat. Some ideas for your tackle box include:
- Pre-sliced meats, such as salami or prosciutto
- Assorted cheeses, such as cheddar, brie, or goat cheese
- Crackers or breadsticks
- Nuts, such as almonds or cashews
- Dried fruit, such as apricots or cranberries
- Fresh fruit, such as grapes or berries
- Vegetables, such as cherry tomatoes or baby carrots
- Olives or pickles
Step 3: Arrange Your Ingredients
Once you have your ingredients, it’s time to start arranging them in your tackle box. Start by placing the larger items, such as meats and cheeses, in the bottom compartments. Then, fill the smaller compartments with crackers, nuts, and dried fruit. Finally, add fresh fruit and vegetables to the top compartments. Make sure to leave some space between items to prevent them from getting squished.
Step 4: Add Some Extras
To add some extra fun and creativity to your charcuterie tackle box, consider adding some fun extras, such as mini jars of mustard or jam, or toothpicks for easy snacking.
Step 5: Pack and Go
Once you’ve arranged your tackle box, it’s time to pack it up and take it on the go! Don’t forget to bring along some utensils, such as knives or spoons, and some napkins for easy clean-up.
A summer charcuterie tackle box is a fun and unique way to present your charcuterie board for any summer gathering. With a few simple steps, you can create a fun and delicious spread that is sure to impress your guests. So grab your tackle box, pack it up with some tasty treats, and head out for a day of fun in the sun!
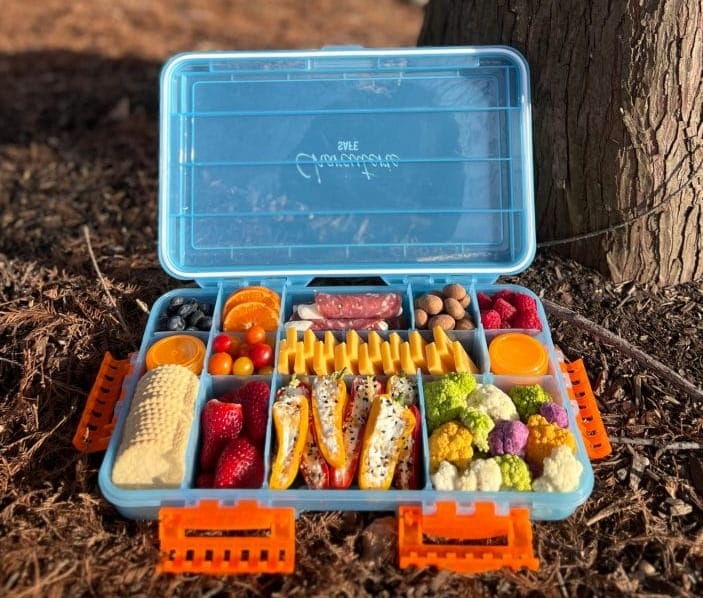
(using the Subsafe Charcuterie Safe)
Drinks to Pair with Your Beach Charcuterie Board
Quench Your Thirst with Coastal Libations
No beach charcuterie experience is complete without a refreshing beverage to complement your savory spread and keep you cool under the sun. Here are some tantalizing drink pairings to elevate your beach charcuterie adventure:
1. Chilled Wines:
- Pair your beach charcuterie board with a crisp and refreshing white wine, such as Sauvignon Blanc or Pinot Grigio, to complement the salty and savory flavors of the charcuterie. Alternatively, opt for a light-bodied rosé or sparkling wine for a touch of effervescence that’s perfect for seaside sipping.
2. Fruity Cocktails:
- Shake up a batch of fruity cocktails to add a tropical twist to your beach charcuterie experience. Try a classic mojito made with fresh mint, lime juice, and rum, or a refreshing sangria infused with seasonal fruits like berries, citrus, and stone fruits. For a non-alcoholic option, mix up a virgin piña colada or mango smoothie for a taste of the tropics without the buzz.
3. Mocktails and Refreshers:
- Keep it light and hydrating with non-alcoholic options like coconut water, sparkling lemonade, or flavored seltzers. Infuse your drinks with fresh herbs like basil or mint, or add a splash of citrus juice for an extra burst of flavor. For a fun and festive touch, garnish your mocktails with colorful fruit skewers or edible flowers.
4. Hydrating Beverages:
- Stay hydrated and refreshed with thirst-quenching beverages like iced tea, infused water, or coconut water. Pack a cooler with pre-made batches of your favorite herbal teas or fruit-infused waters, or bring along individual bottles of coconut water for a natural electrolyte boost to keep you energized throughout the day.
5. Craft Beer and Ciders:
- For beer enthusiasts, opt for light and crisp craft beers or ciders that pair well with the salty and savory flavors of the charcuterie. Choose refreshing styles like pilsners, wheat beers, or session IPAs that won’t weigh you down in the sun, and sip leisurely as you soak up the beach vibes.
With these refreshing drink pairings, you’ll be well-equipped to quench your thirst and enhance the flavors of your beach charcuterie board with every sip. So raise a glass to seaside indulgence and savor the simple pleasures of beachside dining with family and friends.

When it comes to keeping your drinks cool and refreshing on the beach, preparation is key. Here are some tips:
Pre-Chill: Ensure that your beverages are already chilled before heading to the beach. Keep them in a cooler or refrigerator until you’re ready to pack them for your outing.
Insulated Cooler: Invest in a high-quality insulated cooler or cooler bag. These will help maintain the temperature of your drinks, even under the sun. Pack your drinks alongside ice packs or frozen water bottles to keep them cool for longer.
Single-Serve Containers: Consider using single-serve cans or bottles for easy handling and to avoid dilution. They can also be quicker to chill than larger containers.
Shade and Towels: Once at the beach, find a shaded spot to set up your charcuterie board and drinks. This will help prevent direct sunlight from quickly warming your beverages. Use towels or a beach umbrella to create shade if necessary.
By selecting the right drinks and keeping them chilled, you can elevate your beach charcuterie experience to new heights. Remember to drink responsibly and stay hydrated throughout your beach day.
With your beach charcuterie board beautifully arranged and your choice of refreshing beverages at hand, you’re all set to enjoy a delightful culinary adventure by the shore. Cheers to good food, good company, and good times under the sun!
Tips for Transporting Your Beach Charcuterie Board
Transporting your beach charcuterie board requires careful planning to ensure that your delicious creations arrive at your destination fresh and ready to enjoy. Here are some tips to help you transport your beach charcuterie board with ease:
Portable Containers:
Choose sturdy and portable containers that can securely hold your charcuterie board components. Consider using airtight containers for sliced fruits, dips, and other perishable items. Utilize individual containers or small compartments within a larger container to prevent cross-contamination and maintain the integrity of each ingredient.
Insulated Coolers:
Invest in a reliable and insulated cooler to keep your beach charcuterie board cool during transportation. Look for a cooler with sufficient space to accommodate your containers and any necessary ice packs. Opt for coolers with thick insulation and a tight seal to maintain the temperature and freshness of your food.
Layering and Separation:
To prevent ingredients from shifting or getting mixed up during transport, layer your charcuterie board components strategically. Place items like cured meats, cheeses, and delicate fruits at the bottom, followed by crackers or bread. Separate these layers with parchment paper or reusable silicone dividers to maintain their individual textures and flavors.
Ice Packs or Frozen Water Bottles:
Keep your beach charcuterie board chilled by packing ice packs or frozen water bottles alongside the containers. These frozen items will help maintain a cool temperature inside the cooler, ensuring that your food stays fresh and safe to eat. Place them strategically, avoiding direct contact with the charcuterie board to prevent any condensation or unwanted moisture.
Timing is Key:
Plan your transportation to minimize the time your beach charcuterie board spends outside of a temperature-controlled environment. Keep in mind that certain ingredients, like cheeses and dips, are more sensitive to heat and may require extra precautions. Consider packing the cooler right before you leave and aim to arrive at your destination as soon as possible.
Food Safety:
It’s essential to prioritize food safety when transporting your beach charcuterie board. Keep perishable items refrigerated until you are ready to pack them. Avoid leaving the board out in direct sunlight or in a hot car for extended periods. Once at the beach, find a shaded spot to set up your charcuterie board and keep it away from direct heat sources.
By following these tips, you can ensure that your beach charcuterie board arrives in top-notch condition, ready to impress and delight your fellow beachgoers. The right containers, coolers, and careful planning will help you maintain the quality and safety of your culinary masterpiece. Enjoy the journey and the satisfaction of sharing a delectable beach charcuterie experience!

Creative Presentation Ideas for Beach Charcuterie
Infuse Coastal Charm into Your Spread
Elevate your beach charcuterie experience with creative presentation ideas that capture the essence of seaside living and enhance the visual appeal of your spread. Here are some tips for arranging ingredients, garnishing with beach-themed decorations, and incorporating tropical fruits and flavors:
1. Coastal-Inspired Arrangements:
- Arrange your charcuterie ingredients in shapes and patterns that evoke the beauty of the beach. Create waves with slices of cured meats, build sandcastle-like towers with cheese cubes and fruit skewers, or mimic the colors of the ocean with layers of blueberries, grapes, and seaweed snacks.
2. Garnish with Beach-Themed Decorations:
- Add a touch of coastal charm to your charcuterie board with beach-themed decorations like seashells, starfish, or driftwood. Scatter them around the board or use them as accents to highlight certain ingredients. Alternatively, incorporate edible decorations like seaweed salad, shrimp cocktail, or smoked salmon roses for a playful twist on traditional garnishes.
3. Tropical Fruits and Flavors:
- Introduce tropical fruits and flavors to your beach charcuterie spread to transport your taste buds to a faraway paradise. Include exotic fruits like mango, pineapple, and papaya alongside traditional favorites like grapes, berries, and citrus slices. Infuse your spread with tropical flavors by adding coconut shavings, pineapple salsa, or mango chutney as accompaniments to your charcuterie.
4. Colorful Cocktail Umbrellas:
- Add a pop of color and whimsy to your beach charcuterie board with colorful cocktail umbrellas. Stick them into cheese cubes, fruit skewers, or cocktail glasses to create a festive atmosphere and protect your spread from the sun. Choose umbrellas in bright hues like turquoise, coral, and yellow to complement the beachy vibe of your spread.
5. Serve in Seashell Bowls:
- Enhance the coastal theme of your beach charcuterie spread by serving dips, sauces, or condiments in seashell bowls. Fill clean seashells with hummus, salsa, or aioli and place them strategically around the board for easy dipping. Not only do seashell bowls add a decorative touch to your spread, but they also add a fun and interactive element to the dining experience.
With these creative presentation ideas, you can transform your beach charcuterie board into a visual masterpiece that’s as stunning as it is delicious. So let your imagination run wild, embrace the coastal charm, and prepare to dazzle your guests with a beach-inspired spread that’s sure to make waves at your next seaside gathering.

Wrapping It Up
As the waves gently kiss the shore and the sun dances on the horizon, there’s no better time to indulge in the simple pleasures of beach charcuterie. With a thoughtful selection of ingredients, creative presentation ideas, and dietary accommodations, you can create a beach charcuterie spread that’s as delightful as it is delicious.
From savory cheeses to tropical fruits, from crispy crackers to refreshing beverages, there’s something for everyone to enjoy amidst the sun, sand, and salty breeze. Whether you’re lounging on a beach towel, perched on a seaside picnic table, or dipping your toes in the surf, the flavors of the coast are yours to savor and share with family and friends.
So pack your cooler, grab your beach umbrella, and prepare to embark on a seaside culinary journey like no other. Whether you’re celebrating a special occasion, hosting a beachside gathering, or simply soaking up the beauty of nature, a beach charcuterie adventure awaits.
Indulge in the flavors of the coast, embrace the joy of outdoor dining, and create memories that will last a lifetime. Soak up the sun, sink your toes in the sand, and savor every moment of your beach charcuterie adventure. Bon appétit!

Frequently Asked Questions
How do you pack a charcuterie board for the beach?
To pack a charcuterie board for the beach, follow these simple steps:
- Choose a sturdy and lightweight board or tray that’s easy to carry.
- Pick foods that can withstand the heat, like hard cheeses, cured meats, and crackers.
- Use small containers or silicone cups to keep dips, spreads, and fruits separate and prevent them from spilling.
- Pack everything in a cooler or insulated bag with ice packs to keep it fresh and safe to eat.
What goes on a summer charcuterie board?
A summer charcuterie board typically includes a variety of fresh and seasonal fruits, such as berries, melons, and peaches, as well as vegetables like cucumbers, cherry tomatoes, and bell peppers. It also includes a selection of cheeses, cured meats, nuts, and crackers or bread. Other popular additions include dips like hummus or tzatziki, olives, and sweet treats like chocolate or cookies. The key is to incorporate a mix of sweet, savory, and salty flavors, and to choose items that are easy to transport and eat outdoors.
How do you keep a charcuterie board cold for a picnic?
To keep a charcuterie board cold for a picnic, use a cooler or insulated bag with ice packs. Consider using a smaller board to make it easier to transport and keep it covered until ready to serve. Another option is to pack the ingredients separately and assemble the board on-site to ensure maximum freshness.
How do you make a tropical charcuterie board?
To make a tropical charcuterie board, start by selecting a variety of tropical fruits like pineapples, mangoes, and papayas. Next, add some salty snacks like nuts, crackers, or pretzels. You can also include cheese and cured meats like prosciutto or salami. Finish with some fresh herbs for garnish. Arrange everything on a large platter and serve chilled. For a more tropical vibe, you can also use a wooden or bamboo board to serve.
Share Your Creations:
We’d love to see the charcuterie boards you create using our guide! Feel free to share your own creations in the comments or on social media, and tag us for a chance to be featured. And if you have any other ideas or tips for creating the perfect charcuterie board, we’d love to hear them.


