
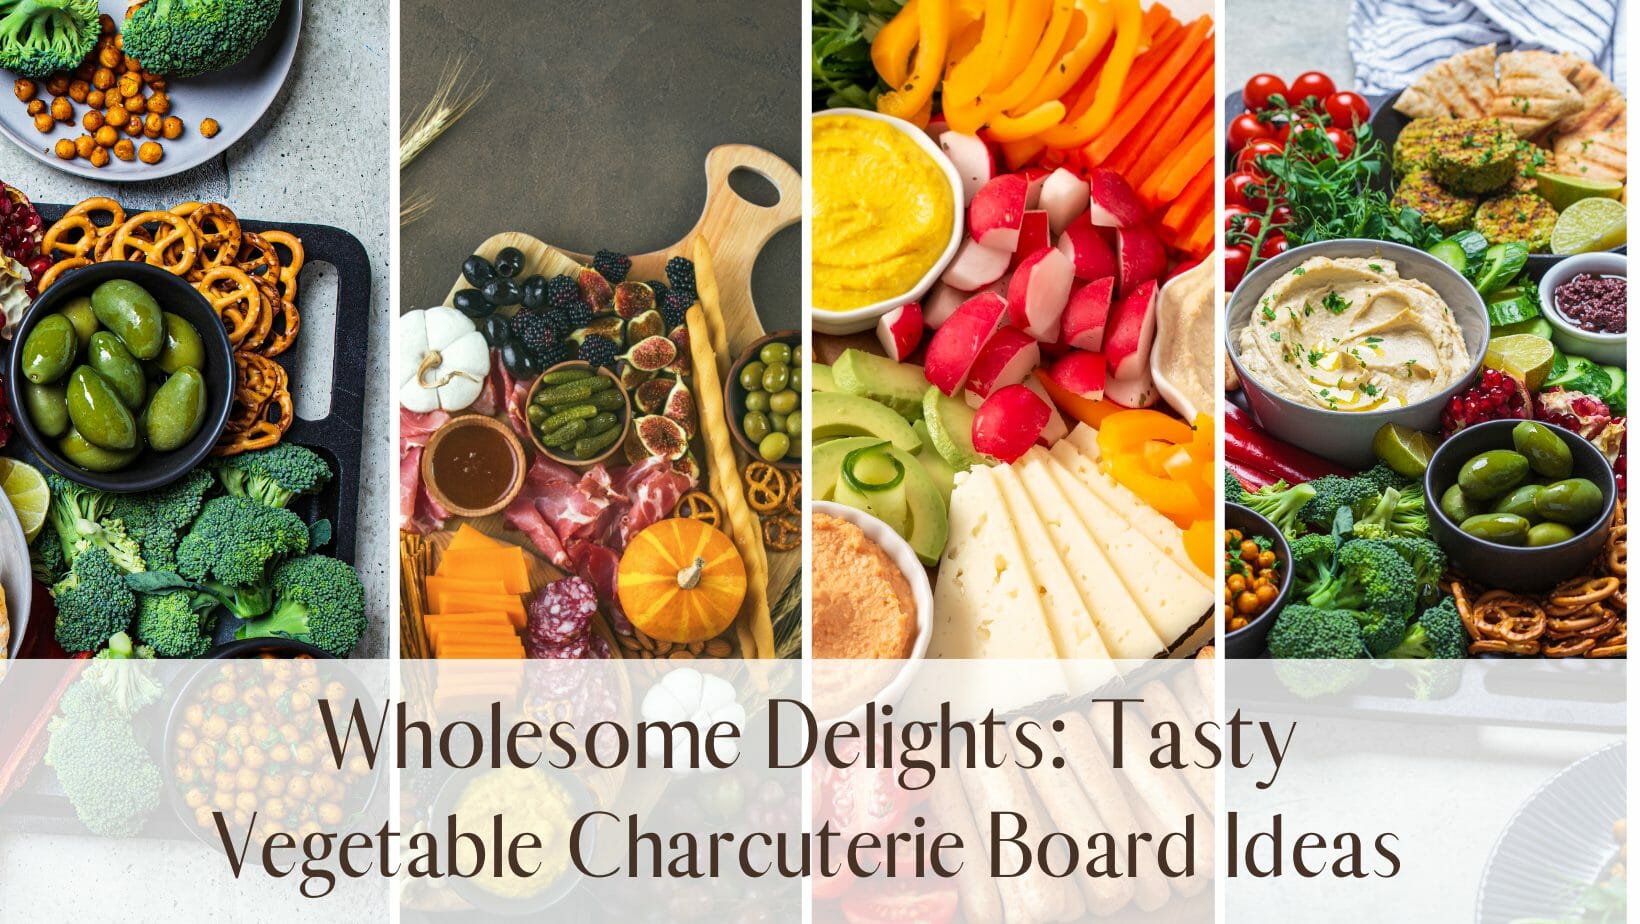
Welcome to the world of vegetable charcuterie boards, where vibrant colors, fresh flavors, and artistic presentations intertwine. In this comprehensive guide, we'll unlock the secrets to crafting stunning and mouthwatering boards that will impress both your eyes and taste buds. From selecting the perfect vegetables and creating delectable accompaniments to mastering the art of arrangement and catering to different dietary preferences, get ready to embark on a journey of culinary creativity. Whether you're a seasoned entertainer or a kitchen enthusiast looking to elevate your appetizer game, this article is your go-to resource for creating show-stopping vegetable charcuterie boards that will leave your guests in awe. Let's dive in and explore the possibilities of this delightful and wholesome culinary trend.
Fast-track your charcuterie skills and connect with 514K experts. Click for instant access to our comprehensive guide and community >>
Table of Contents [CLICK HERE TO OPEN]
- Components and Ingredients for an Impressive Vegetable Charcuterie Board
- Designing and Styling Tips for an Eye-Catching Vegetable Charcuterie Board
- Adapting Vegetable Charcuterie Boards for Different Dietary Preferences
- Seasonal Vegetable Charcuterie Boards
- Creative Presentation and Decorative Touches for Your Vegetable Charcuterie Board
- Storage, Preservation, and Budget-Friendly Tips for Your Vegetable Charcuterie Board
- Wrapping It Up
- Frequently Asked Questions
Components and Ingredients for an Impressive Vegetable Charcuterie Board
Creating a visually stunning and flavorful vegetable charcuterie board requires careful selection and arrangement of various components. Each element should complement the others, offering a mix of textures, flavors, and colors. Here are some essential components and ingredients to consider:
1. Fresh Vegetables
Choose a variety of fresh vegetables to provide a colorful and crunchy base for your board. Include both common and unique options to keep it interesting:
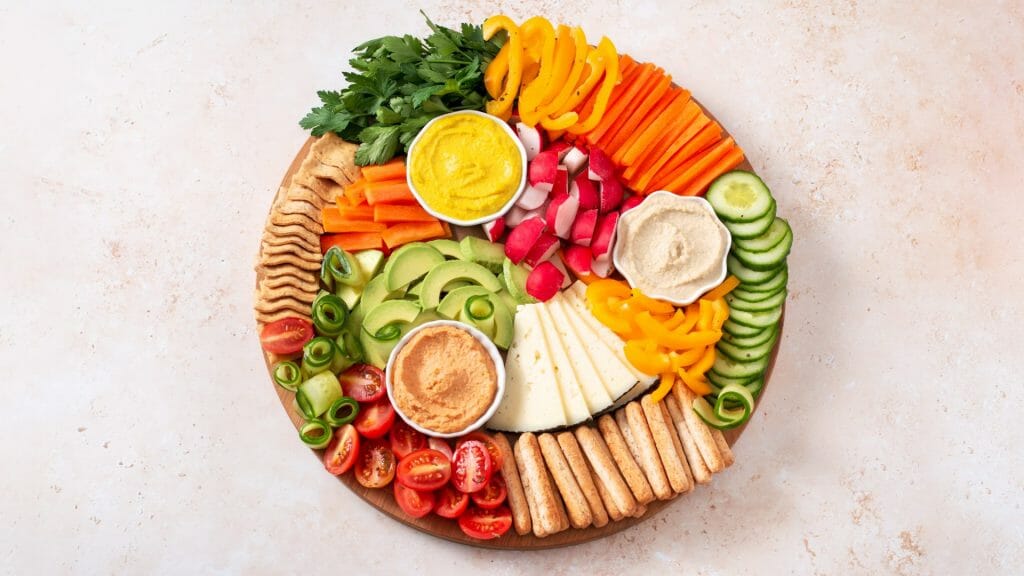
- Carrots: Offer different colors like orange, purple, and yellow, sliced into sticks or rounds.
- Bell Peppers: Red, yellow, and green peppers add vibrant color and a sweet, crisp flavor.
- Cherry Tomatoes: Their bright colors and juicy texture are perfect for popping into your mouth.
- Cucumbers: Sliced into rounds or sticks, cucumbers provide a refreshing crunch.
- Radishes: Both red and watermelon radishes add a peppery bite and beautiful color.
- Snap Peas: These add a sweet crunch that pairs well with various dips.
2. Pickled Vegetables
Pickled vegetables add a tangy, savory element to your board, enhancing the flavors of the fresh produce:
- Pickled Carrots and Beets: Sweet and tangy, they add both flavor and color.
- Cornichons or Gherkins: These tiny pickles provide a sharp contrast to fresh vegetables.
- Pickled Onions: Their sweet and tangy flavor can cut through richer dips and spreads.
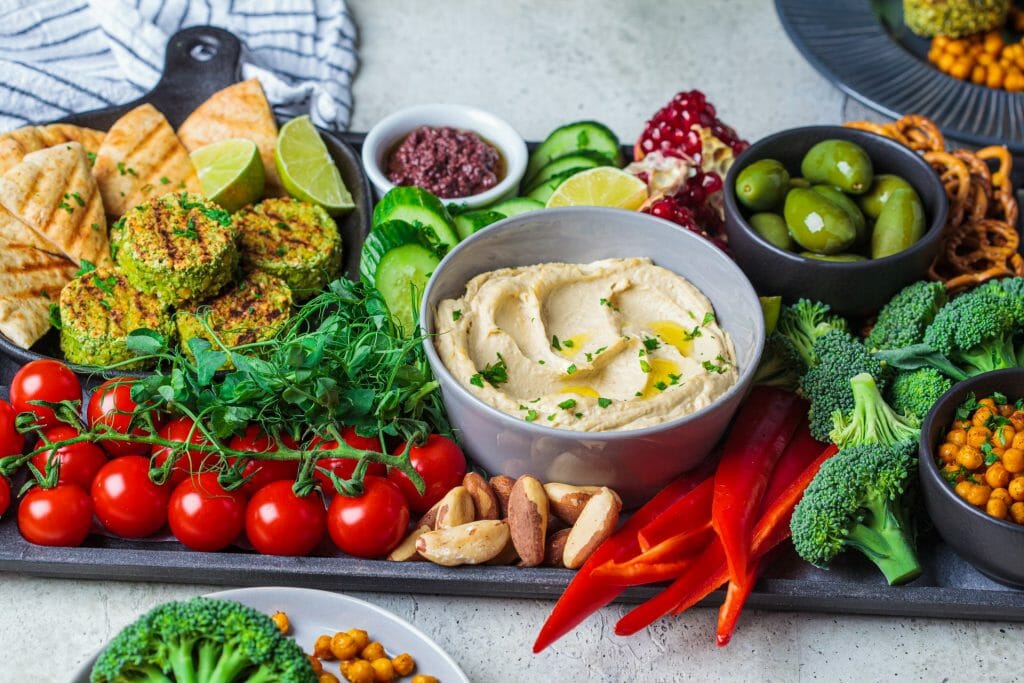
- Olives: A mix of green and black olives adds a briny depth.
3. Roasted or Grilled Vegetables
Roasting or grilling vegetables can bring out their natural sweetness and add a smoky flavor:
- Asparagus: Lightly grilled, it adds a tender yet firm texture.
- Zucchini and Squash: Sliced and grilled, they provide a hearty, slightly smoky flavor.
- Brussels Sprouts: Roasted with a bit of olive oil and salt until crispy.
4. Dips and Spreads
Dips and spreads are essential for adding flavor and richness:
- Hummus: Classic or flavored varieties like roasted red pepper or beet hummus.
- Baba Ganoush: This smoky eggplant dip pairs well with both fresh and roasted vegetables.
- Tzatziki: A cool, creamy cucumber-yogurt dip that complements fresh veggies.
- Guacamole: Adds a creamy, rich element with a touch of acidity.

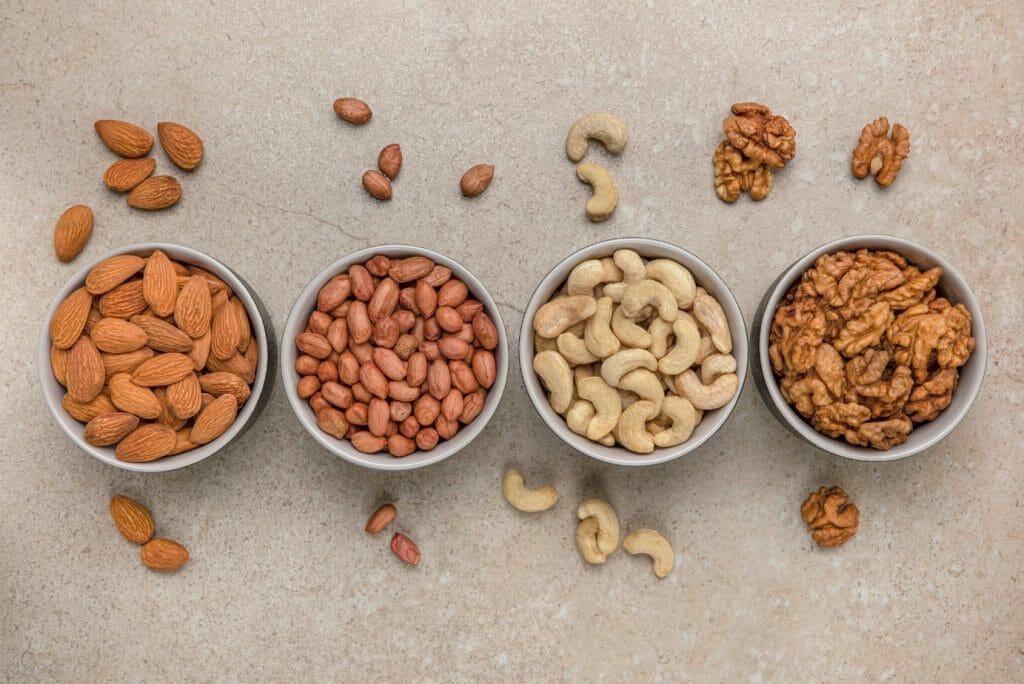
5. Nuts and Seeds
Nuts and seeds add crunch and protein, making the board more satisfying:
- Almonds: Roasted or raw, they provide a hearty crunch.
- Pistachios: Their unique flavor pairs well with both fresh and roasted vegetables.
- Sunflower Seeds: Sprinkle them over dips for added texture.
6. Cheeses
While traditional charcuterie boards focus on meats, a vegetable board can include a few cheese options for variety:
- Goat Cheese: Its tangy flavor and creamy texture complement fresh vegetables.
- Feta: Crumbled over vegetables or served in chunks, it adds a salty bite.
- Mozzarella Balls: Fresh mozzarella balls, also known as bocconcini, add a mild, creamy element.
7. Bread and Crackers
Offer a selection of breads and crackers to serve as vehicles for the dips and spreads:
- Whole Grain Crackers: Provide a hearty base for toppings.
- Sourdough Bread: Sliced and lightly toasted, it adds a tangy, chewy texture.
- Pita Chips: Perfect for dipping and adding a bit of crunch.

8. Garnishes and Extras
Finally, add garnishes and extras to enhance the overall presentation and flavor:
- Fresh Herbs: Sprinkle fresh basil, cilantro, or parsley for added freshness and color.
- Edible Flowers: For a touch of elegance and beauty.
- Lemon Wedges: For squeezing over the vegetables to add a burst of acidity.
- Microgreens: These tiny greens can add a bit of crunch and a burst of flavor.
By thoughtfully selecting and arranging these components, you can create a vegetable charcuterie board that is not only impressive in appearance but also delightful in taste and texture.

Designing and Styling Tips for an Eye-Catching Vegetable Charcuterie Board
Creating a visually appealing vegetable charcuterie board involves more than just choosing the right ingredients; it's also about how you present them. With some thoughtful planning and a few styling tips, you can design a board that is as beautiful as it is delicious. Here’s a step-by-step guide to help you craft an eye-catching vegetable charcuterie board:
Step 1: Select a Suitable Board
Choose a large, flat surface that will serve as the canvas for your display. Wooden boards, marble slabs, or large platters work well. The size of the board should be proportionate to the number of ingredients you plan to include.
Step 2: Plan Your Layout
Before you start arranging, consider the following layout tips:
- Balance: Distribute colors and textures evenly across the board.
- Height Variation: Incorporate elements of different heights by using small bowls or risers for dips and spreads.
- Grouping: Cluster similar items together but leave enough space for other ingredients to shine.
Step 3: Arrange the Base Ingredients
Start by placing the larger items that will form the foundation of your board:
- Dips and Spreads: Place bowls of hummus, tzatziki, baba ganoush, or guacamole in strategic spots around the board. Ensure they are spaced out so that they are easily accessible from all angles.
- Cheeses: Position cheese options in small clusters or slices near the dips for easy pairing.
Step 4: Add Fresh Vegetables
Next, arrange your fresh vegetables around the dips and cheeses:
- Line the Edges: Create a border with vibrant vegetables like carrots, bell peppers, and cucumber slices. This will add a pop of color around the perimeter.
- Fill in the Gaps: Place smaller vegetables like cherry tomatoes and snap peas in the gaps between larger items. Group them in small clusters for a natural look.
Step 5: Incorporate Pickled and Roasted Vegetables
Add your pickled and roasted vegetables to enhance variety and visual appeal:
- Pickled Vegetables: Arrange pickled items like cornichons and pickled onions in small bowls or directly on the board, ensuring they are spread out.
- Roasted Vegetables: Place roasted items like asparagus and Brussels sprouts in a few scattered spots, allowing their textures and colors to contrast with fresh vegetables.
Step 6: Add Nuts, Seeds, and Bread
Incorporate crunchy elements and bread:
- Nuts and Seeds: Scatter almonds, pistachios, and sunflower seeds around the board. Use small bowls or just sprinkle them directly.
- Bread and Crackers: Arrange slices of sourdough or pita chips in a fan or stack them neatly. Place them in accessible areas where they won’t overcrowd other elements.
Step 7: Garnish and Finish
Add final touches to elevate the presentation:
- Fresh Herbs: Sprinkle fresh herbs like basil, cilantro, or parsley around the board for a burst of green and added fragrance.
- Edible Flowers: Place a few edible flowers in strategic spots to add a touch of elegance and color.
- Lemon Wedges: Arrange lemon wedges near the dips for a fresh, tangy option that guests can squeeze over their veggies.
- Microgreens: Scatter microgreens in empty spaces to add a bit of texture and color contrast.
Step 8: Consider Texture and Color Contrast
Ensure that there’s a good mix of textures and colors throughout the board:
- Texture: Combine crunchy, creamy, and tangy elements to keep things interesting.
- Color: Aim for a variety of colors to make the board visually appealing. Think about how each ingredient’s color will complement or contrast with the others.
Step 9: Check for Balance and Adjust
Step back and review your board from different angles:
- Adjust Placement: Make sure everything looks balanced and adjust placements if needed.
- Refill and Replenish: If some items are missing or low, refill as needed before serving.
By following these steps and paying attention to detail, you’ll create a vegetable charcuterie board that not only looks impressive but also provides a delightful array of flavors and textures for everyone to enjoy.
Adapting Vegetable Charcuterie Boards for Different Dietary Preferences
A vegetable charcuterie board is a versatile and inclusive option that can be easily adapted to suit various dietary preferences and restrictions. By making thoughtful substitutions and additions, you can ensure that your board caters to a wide range of tastes and needs. Here’s how to customize your vegetable charcuterie board for different dietary preferences:
1. Vegan
For a vegan-friendly charcuterie board, avoid all animal products and focus on plant-based ingredients:
- Dips and Spreads: Choose or make plant-based options such as hummus, baba ganoush, guacamole, and vegan tzatziki. Ensure that all store-bought dips are labeled vegan.
- Cheese Alternatives: Use vegan cheeses made from nuts, soy, or coconut. There are many varieties available, including vegan cream cheese, mozzarella, and cheddar.
- Meat Substitutes: Although not traditional, you can include plant-based “meat” products like vegan pepperoni or sausage for added variety.
2. Gluten-Free
To accommodate gluten-free diets, ensure that all components of your board are free from gluten:
- Bread and Crackers: Use gluten-free crackers and bread. There are numerous gluten-free options available, including rice crackers, gluten-free pita chips, and specially made gluten-free bread.
- Labeling: Clearly label gluten-free items to avoid any confusion and make it easier for guests with gluten sensitivities.
3. Low-Carb/Keto
For those following a low-carb or keto diet, focus on ingredients that are low in carbohydrates:
- Vegetables: Include low-carb veggies such as bell peppers, cucumbers, celery, and radishes. Avoid higher-carb vegetables like carrots and beets.
- Cheese and Meats: Add full-fat cheeses like cheddar, gouda, and cream cheese. Include keto-friendly meat options like prosciutto, salami, or other cured meats.
- Dips and Spreads: Opt for keto-friendly dips such as guacamole and sour cream-based dips, and avoid those with added sugars.
4. Dairy-Free
For a dairy-free board, exclude all dairy products and focus on plant-based alternatives:
- Cheese Alternatives: Use dairy-free cheeses made from nuts, soy, or coconut. Ensure they are not just lactose-free but completely dairy-free.
- Creamy Dips: Choose or make dairy-free versions of dips like hummus, guacamole, or tahini-based spreads. Avoid dips that use dairy ingredients like sour cream or yogurt.
5. Nut-Free
If you need to accommodate nut allergies, avoid using any nuts and nut-based products:
- Substitutes: Replace nuts with seeds like sunflower seeds or pumpkin seeds. Ensure all dips and spreads are free from nut ingredients.
- Labeling: Clearly label any nut-free items and ensure they are prepared in an environment free from cross-contamination with nuts.
6. Whole30
For a Whole30-compliant board, adhere to the specific rules of the Whole30 program:
- Dips and Spreads: Focus on Whole30-approved dips like guacamole and salsa. Avoid any products with added sugars, preservatives, or non-compliant ingredients.
- Meats: Include compliant meats such as nitrate-free deli meats or cooked meats that meet Whole30 guidelines.
- Vegetables: Ensure all vegetables are fresh or prepared with Whole30-approved methods and seasonings.
7. Paleo
To create a Paleo-friendly board, adhere to the dietary principles of the Paleo diet:
- Dips and Spreads: Use dips that are made from whole foods, such as guacamole or vegetable-based salsas. Avoid any dips with dairy or processed ingredients.
- Meats: Include high-quality meats such as grilled chicken or beef jerky that is free from artificial additives.
- Vegetables: Stick to non-starchy vegetables and avoid legumes and grains. Fresh and roasted vegetables are perfect for this diet.
8. Sugar-Free
For a sugar-free charcuterie board, avoid ingredients with added sugars:
- Dips and Spreads: Choose or make dips without added sugars. Many classic dips like hummus and guacamole fit this requirement, but always check labels for any hidden sugars.
- Fruits and Vegetables: Focus on fresh vegetables and avoid any fruits that may have high sugar content. Stick to low-sugar fruits if included.
By adapting your vegetable charcuterie board to suit these dietary preferences, you ensure that all guests can enjoy a delicious and inclusive selection. Making thoughtful ingredient choices and clear labeling will help accommodate various dietary needs and create a board that everyone can enjoy.

Seasonal Vegetable Charcuterie Boards
Creating a vegetable charcuterie board that highlights seasonal produce is a fantastic way to celebrate the flavors and colors of each season. Seasonal vegetables not only taste better and are more nutritious, but they also add a natural variety to your board. Here’s how to craft seasonal vegetable charcuterie boards that showcase the best of each time of year:
Spring
Spring brings a bounty of fresh, vibrant vegetables. To create a spring-inspired vegetable charcuterie board:
- Key Vegetables: Incorporate tender greens like asparagus, snap peas, and radishes. Add delicate vegetables such as baby carrots, sugar snap peas, and mini bell peppers.
- Color and Flavor: Use fresh herbs like dill and mint to brighten up your board. Include seasonal fruits like strawberries or rhubarb for a touch of sweetness.
- Presentation Tips: Arrange vegetables in clusters to highlight their fresh, crisp nature. Add a light, citrus-based dip or a yogurt-based spread to complement the freshness of spring vegetables.
Summer
Summer is perfect for showcasing a wide array of colorful and juicy vegetables. For a summer-themed charcuterie board:
- Key Vegetables: Feature juicy tomatoes, cucumbers, corn on the cob (cut into small segments), and sweet bell peppers. Consider adding grilled or roasted vegetables like zucchini and eggplant.
- Color and Flavor: Include fresh herbs such as basil and cilantro. You can also add seasonal fruits like cherries or melon slices.
- Presentation Tips: Emphasize bright colors and refreshing textures. Serve with light dips like tzatziki or guacamole. Use a rustic wooden board or a large platter to accommodate the abundance of summer produce.
Fall
Fall introduces heartier vegetables with rich, earthy flavors. To create a fall-inspired charcuterie board:
- Key Vegetables: Use root vegetables such as carrots, sweet potatoes, beets, and squash. Roasted Brussels sprouts and cauliflower can also add depth.
- Color and Flavor: Incorporate warm spices like cinnamon or nutmeg in your dips or spreads. Add seasonal fruits like apples and pears for a sweet contrast.
- Presentation Tips: Arrange vegetables in a more structured, rustic layout. Use warm-toned plates or a dark wooden board to enhance the autumnal feel. Serve with hearty dips like a pumpkin hummus or a spiced yogurt dip.
Winter
Winter's vegetables tend to be more robust and can handle richer flavors. For a winter-themed vegetable charcuterie board:
- Key Vegetables: Feature hearty options like root vegetables (parsnips, turnips), winter greens (kale, collard greens), and cruciferous vegetables (cabbage, broccoli). Consider including pickled vegetables for added tang.
- Color and Flavor: Use bold, warming spices in your dips and spreads, such as curry or paprika. Add seasonal fruits like citrus (oranges, grapefruits) for a burst of freshness.
- Presentation Tips: Opt for a cozy, comforting presentation with layered textures and colors. Serve with rich dips like roasted red pepper dip or a creamy avocado spread. Use a deep-toned or dark-colored board to make the vibrant colors of winter vegetables pop.
General Tips for Seasonal Charcuterie Boards
- Research Seasonal Availability: Know which vegetables are in season in your region to ensure you’re using the freshest, most flavorful ingredients.
- Mix Textures: Combine raw, roasted, and pickled vegetables to provide a variety of textures and flavors.
- Adjust for Local Preferences: Tailor the vegetables and presentation to suit local tastes and availability. Seasonal variations can differ based on your location, so adapt accordingly.
By focusing on seasonal produce, you not only enhance the flavor and appearance of your vegetable charcuterie board but also celebrate the bounty of each season. This approach allows you to create boards that are both visually appealing and aligned with the natural rhythms of the year.
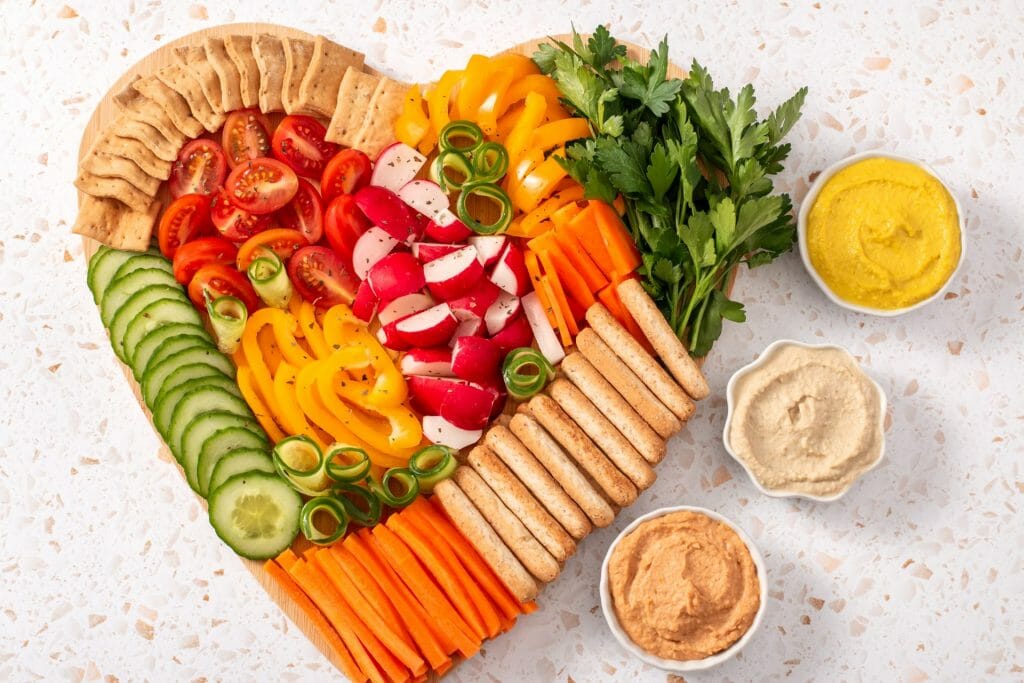
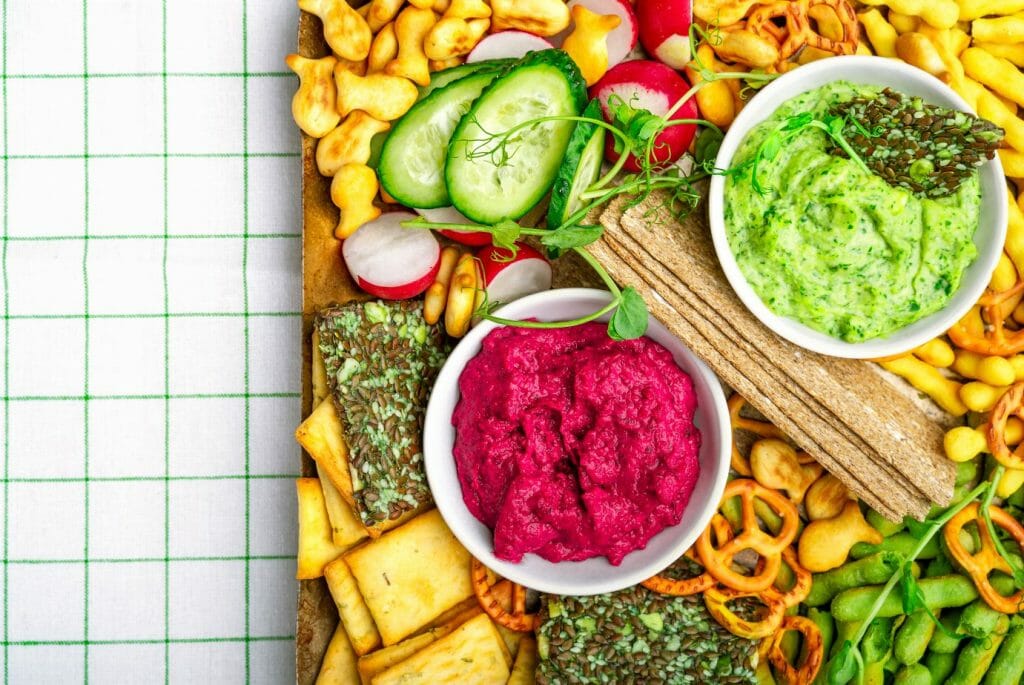
Creative Presentation and Decorative Touches for Your Vegetable Charcuterie Board
Creating a vegetable charcuterie board isn’t just about the ingredients; it’s also about how you present and style them. By employing creative presentation techniques and adding decorative touches, you can elevate your board to a visually stunning centerpiece that captivates and delights your guests. Here’s how to make your vegetable charcuterie board both artistic and appetizing:
1. Layered Heights and Levels
Add dimension to your board by incorporating varying heights:
- Tiered Stands: Use tiered trays or risers to display dips, cheeses, and some vegetables at different levels. This adds visual interest and makes it easier for guests to access everything.
- Small Bowls and Jars: Place dips, spreads, and pickled vegetables in small bowls or jars. Arrange them strategically around the board to create focal points.
2. Use Unique Serving Ware
Opt for unconventional serving pieces to enhance the board’s visual appeal:
- Wooden Boards: A rustic wooden board can add warmth and texture.
- Marble Slabs: A sleek marble slab offers a clean and elegant backdrop.
- Slate Tiles: Slate tiles can add a modern touch and contrast nicely with colorful vegetables.
3. Artistic Arrangement
Arrange the ingredients in a visually pleasing and artistic manner:
- Color Blocking: Group vegetables by color to create vibrant sections. For example, place all red bell peppers and cherry tomatoes in one area for a striking contrast.
- Patterns and Shapes: Arrange vegetables in patterns or shapes, such as a spiral of sliced cucumbers or a fan of radishes, to draw the eye and make the board more engaging.
- Flow and Balance: Create a natural flow by arranging items in a semi-circular or diagonal pattern, balancing different colors and textures.
4. Garnishing and Edible Decorations
Add final touches that enhance both the aesthetics and flavor:
- Fresh Herbs: Sprinkle fresh herbs like basil, rosemary, or dill around the board. They add a burst of green and a fresh aroma.
- Edible Flowers: Incorporate edible flowers such as nasturtiums or pansies for a touch of elegance and color.
- Microgreens: Scatter microgreens for an added layer of texture and a pop of vibrant color.
- Citrus Wedges: Add lemon or lime wedges around the board for a zesty, decorative element. They also serve as a practical garnish for guests.
5. Creative Use of Containers
Incorporate creative containers and tools:
- Wooden Crates: Small wooden crates or boxes can be used to group items or add height.
- Antique Platters: Vintage platters or serving dishes can lend a charming, rustic feel.
- Glass Jars: Use glass jars to hold pickled vegetables or small garnishes, adding a transparent element that showcases the contents.
6. Seasonal Decor
Tailor your presentation to reflect the season:
- Seasonal Touches: For autumn, add small pumpkins or gourds. In spring, include twigs of flowering branches. For winter, incorporate pinecones or evergreen sprigs.
- Festive Elements: During holidays or special occasions, incorporate themed decorations such as edible holiday shapes or colored napkins.
7. Balanced Composition
Ensure your board has a balanced and cohesive look:
- Symmetry and Asymmetry: Decide on a symmetrical or asymmetrical design based on the look you want. Symmetrical designs offer a formal appearance, while asymmetrical layouts can feel more casual and dynamic.
- Space and Accessibility: Leave enough space between items so that guests can easily access everything. Avoid overcrowding to maintain a clean and inviting appearance.
By combining these creative presentation ideas with decorative touches, you can transform your vegetable charcuterie board into a visually appealing and appetizing experience. The key is to experiment with different elements and arrangements to find what best enhances the beauty and enjoyment of your board.
Storage, Preservation, and Budget-Friendly Tips for Your Vegetable Charcuterie Board
Creating a beautiful vegetable charcuterie board is just the beginning. To ensure that your ingredients stay fresh and that you manage your budget effectively, it's important to know how to store leftovers properly and make cost-effective choices. Here’s a guide to help you with both storage and budget-friendly tips:
Storage and Preservation
1. Proper Storage of Vegetables
- Crispness Preservation: To keep prepped vegetables crisp, store them in airtight containers or resealable bags. For cut vegetables like carrots and celery, place them in a container with a small amount of water to maintain their crunch.
- Refrigeration: Keep all vegetables in the refrigerator to slow down spoilage. Use the crisper drawer for optimal humidity control.
- Avoiding Moisture: Ensure vegetables are dry before storing. Excess moisture can lead to mold and faster decay. Pat them dry with a paper towel before placing them in containers.
2. Storing Dips and Spreads
- Airtight Containers: Store dips and spreads in airtight containers to prevent them from drying out and absorbing other odors from the fridge.
- Labeling: Label containers with the date they were made or opened. Most homemade dips will stay fresh for about 3-5 days.
- Freezing: For dips that freeze well, like hummus or certain bean dips, you can freeze them in portion-sized containers. Thaw in the refrigerator before serving and stir to restore texture.
3. Handling Leftovers
- Refrigeration Time: Consume leftovers within 3-5 days for best quality. If you notice any changes in color, texture, or smell, it’s best to discard them.
- Repacking: If you have leftover dips or vegetables, repack them into clean, airtight containers to maintain freshness for as long as possible.
Budget-Friendly Tips
1. Smart Shopping
- Seasonal Produce: Buy vegetables that are in season, as they are generally more affordable and fresher. Seasonal produce often costs less and tastes better.
- Bulk Buying: Purchase items like crackers, nuts, and dips in bulk. This can reduce the per-unit cost and ensure you have extras on hand for future boards or other uses.
- Local Markets: Check out local farmers' markets or discount stores for fresh produce and artisanal items at lower prices.
2. Make Your Own
- DIY Dips: Instead of buying pre-made dips, make your own. Simple recipes for hummus, guacamole, and salsa can be cost-effective and customizable. Use ingredients you already have at home.
- Homemade Crackers: Try baking your own crackers or bread. Homemade options can be less expensive than store-bought varieties and allow you to control ingredients and flavors.
3. Minimize Waste
- Repurpose Leftovers: Use leftover vegetables in soups, salads, or stir-fries. Dips can be incorporated into recipes or used as spreads on sandwiches.
- Creative Use of Scraps: Save vegetable peels and scraps to make homemade vegetable stock. It’s a great way to utilize every part of the vegetable and enhance flavors in other dishes.
4. Plan and Prep
- Meal Planning: Plan your charcuterie board around what’s on sale or what you already have at home. This will help you avoid buying unnecessary items and stick to your budget.
- Prep Ahead: Preparing vegetables and dips in advance can save time and help you make better use of ingredients you’ve purchased. Store prepped items properly to maximize their shelf life.
By following these storage, preservation, and budget-friendly tips, you can extend the life of your vegetable charcuterie board ingredients, make cost-effective choices, and minimize waste. This approach not only helps maintain the freshness and quality of your board but also supports smart and economical planning.
Wrapping It Up
Creating a vegetable charcuterie board is a delightful way to showcase fresh, vibrant produce while catering to various tastes and dietary preferences. By thoughtfully selecting seasonal vegetables, employing creative presentation techniques, and adding decorative touches, you can craft a visually stunning and appetizing board that will impress your guests.
Remember to keep your ingredients fresh with proper storage and preservation methods, and utilize budget-friendly tips to make the most of your shopping. With these strategies, you’ll not only enhance the visual appeal and flavor of your vegetable charcuterie board but also ensure that you manage resources efficiently and reduce waste.
Whether you’re hosting a casual gathering or a special event, your vegetable charcuterie board will be a centerpiece that celebrates the best of seasonal produce and offers a delicious, inclusive experience for everyone. Enjoy the process of designing and presenting your board, and savor the satisfaction of sharing a beautiful and tasty creation with those you care about.
Frequently Asked Questions
What vegetables are good on a charcuterie board?
Some vegetables that are great choices for a vegetable charcuterie board include:
- Cucumbers: Refreshing and versatile, cucumbers add a crisp texture to the board.
- Cherry tomatoes: Bursting with flavor, cherry tomatoes provide a pop of color and juiciness.
- Carrots: Sweet and crunchy, carrots are a classic choice for dipping and snacking.
- Bell peppers: Vibrant and crunchy, bell peppers offer a variety of colors and flavors.
- Radishes: Peppery and crisp, radishes add a unique zing to the board.
- Celery: Light and refreshing, celery pairs well with dips and spreads.
- Broccoli florets: Nutritious and flavorful, broccoli florets add texture and color.
- Cauliflower: Versatile and mild, cauliflower can be served raw or roasted for added depth.
- Snap peas: Sweet and crunchy, snap peas are a delightful addition to the board.
Feel free to mix and match these vegetables based on your personal preferences and the overall theme of your vegetable charcuterie board. Remember to choose a variety of colors, textures, and flavors for an appealing and well-rounded presentation.
How to make a veg charcuterie board?
To make a veg charcuterie board:
- Start by selecting a variety of fresh vegetables like cucumbers, cherry tomatoes, carrots, bell peppers, and radishes.
- Wash and prep the vegetables, cutting them into bite-sized pieces or sticks.
- Arrange the vegetables on a serving board or platter, considering colors, shapes, and textures.
- Add complementary elements like dips, spreads, fruits, nuts, and seeds.
- Get creative with presentation, using different arrangements and garnishes.
- Serve and enjoy your vibrant and delicious veg charcuterie board.
Remember to personalize your board based on your preferences and dietary needs. Consider incorporating seasonal produce and experimenting with different flavor combinations. Have fun and let your creativity shine!
Is there a vegetarian charcuterie board?
Yes, there is a vegetarian version of a charcuterie board called a vegetarian charcuterie board. It features a selection of plant-based ingredients and excludes meat or animal products typically found on traditional charcuterie boards. Vegetarian charcuterie boards often include a variety of fresh vegetables, fruits, cheeses, nuts, seeds, dips, and other plant-based alternatives. They provide a flavorful and visually appealing option for those who follow a vegetarian diet or simply prefer plant-based options.
What is a charcuterie board with no meat?
A charcuterie board with no meat is typically referred to as a vegetarian charcuterie board. It consists of an assortment of plant-based ingredients, such as fresh vegetables, fruits, cheeses, nuts, seeds, dips, and other vegetarian-friendly options. The focus is on creating a visually appealing and delicious spread without the inclusion of any meat or animal products. Vegetarian charcuterie boards offer a tasty alternative for those who follow a vegetarian diet or prefer plant-based options.
Share Your Creations:
We’d love to see the charcuterie boards you create using our guide! Feel free to share your own creations in the comments or on social media, and tag us for a chance to be featured. And if you have any other ideas or tips for creating the perfect charcuterie board, we’d love to hear them.


