
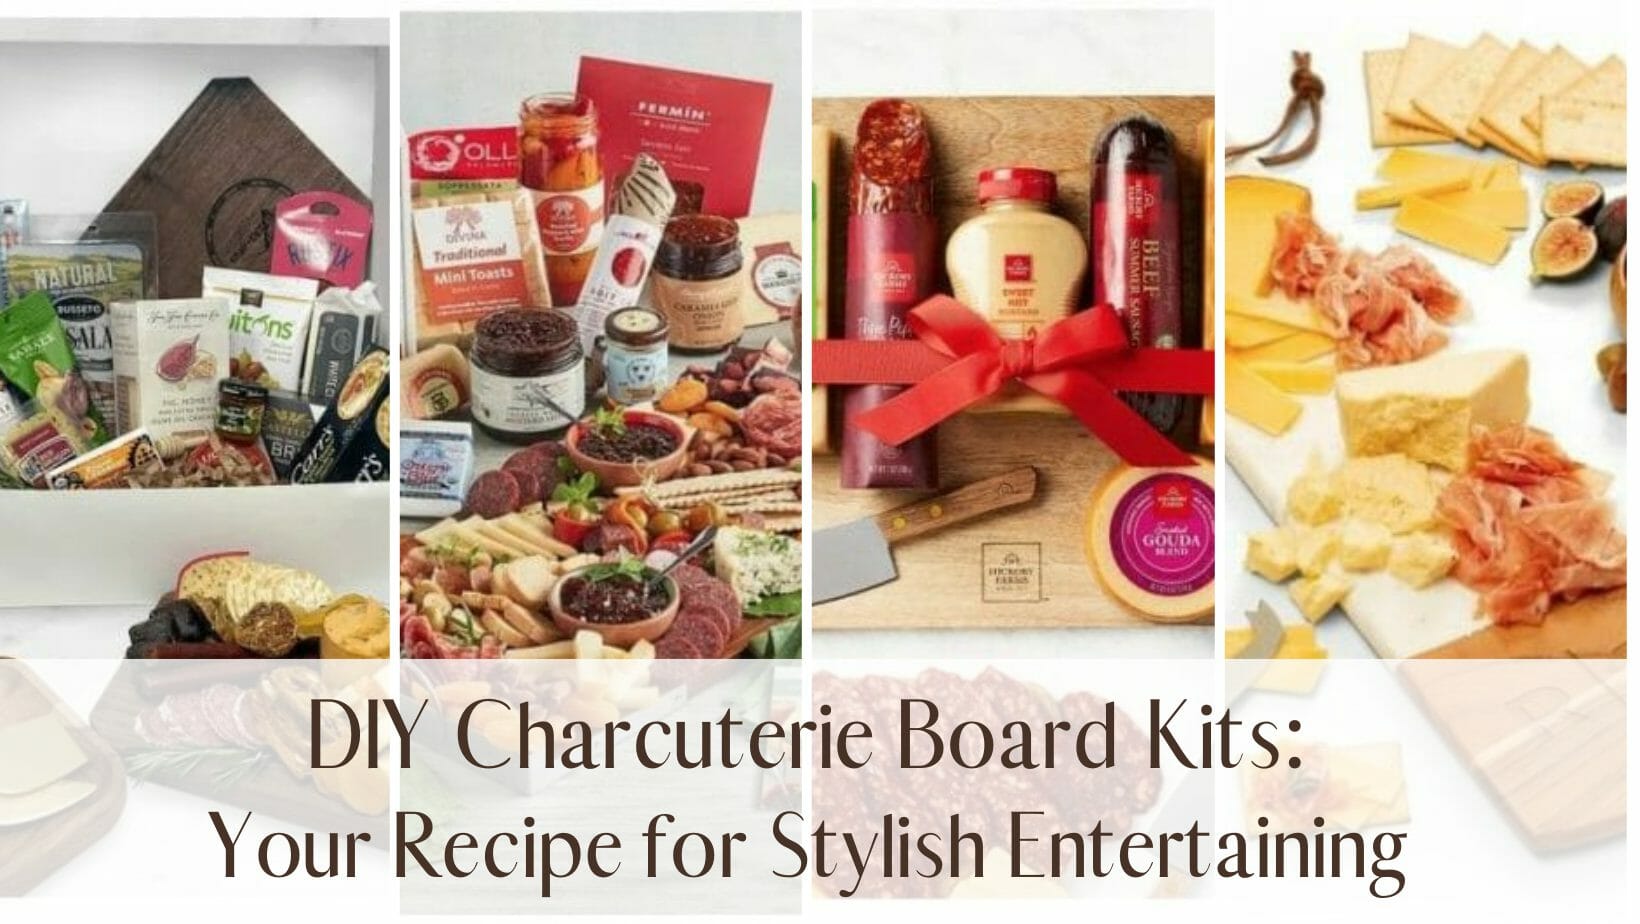
Welcome to the world of delectable delights and stylish displays! If you’ve ever marveled at the captivating charm of charcuterie boards, you’re in for a treat. In this ultimate guide, we’ll unlock the secrets to creating your very own DIY charcuterie masterpiece. From essential ingredients to top-notch kits, get ready to elevate your hosting game and impress your guests with irresistible spreads. Let’s embark on a culinary adventure that will leave taste buds tingling and hearts full of delight!
Fast-track your charcuterie skills and connect with 514K experts. Click for instant access to our comprehensive guide and community >>
Table of Contents [CLICK HERE TO OPEN]
- A Flavorful Journey into Charcuterie Board Delights
- Must-Have Components for DIY Charcuterie Boards
- What to Look For in a Kit
- Our Top Charcuterie Board Kit Picks
- Step-by-Step Guide to Assembling Your DIY Charcuterie Board Kit
- Tips For Enhancing Your Display
- Caring for Your Charcuterie Board and Utensils
- Hosting with DIY Charcuterie Boards
- Answering Your Burning Questions About DIY Charcuterie Board Kits
- Wrapping It Up
- People Also Asked
A Flavorful Journey into Charcuterie Board Delights
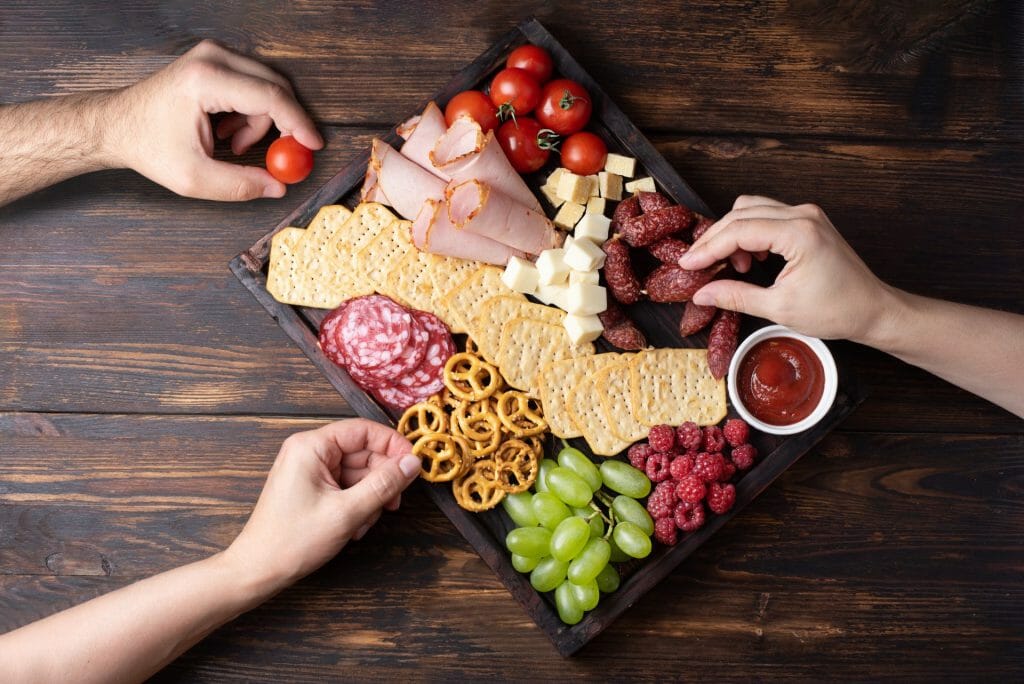
Picture this: a gathering of friends, laughter filling the air, and at the heart of it all, a captivating spread that awakens the senses and ignites conversations. Charcuterie boards have swiftly become the life of the party, turning gatherings into unforgettable feasts that tickle the taste buds and indulge the eyes. If you’ve ever found yourself marveling at the artistry of these culinary creations, you’re not alone – charcuterie boards have taken the world by storm, transforming ordinary get-togethers into remarkable experiences.
But here’s the kicker – assembling a charcuterie board that’s not just a delight for the palate but also a feast for the eyes might seem like a daunting task. And that’s where the magic of DIY charcuterie board kits comes into play. These kits are like a treasure trove of culinary creativity, carefully curated to take the guesswork out of crafting a jaw-dropping charcuterie masterpiece.
Enter the DIY Charcuterie Board Kit: Your Creative Sidekick
Imagine having a toolkit that’s practically a culinary fairy godmother – with all the essentials you need to whip up a charcuterie board that will have your guests talking long after the party ends. From cheese knives that glide through creamy Brie to stylish serving trays that elevate the presentation, these kits are designed with one goal in mind: making the charcuterie experience both convenient and utterly delightful.
Now, I know what you might be thinking – why opt for a DIY charcuterie board kit when you could scout the farmers’ market and cheese shops yourself? Well, that’s where the magic truly lies. These kits aren’t just a shortcut to assembling a board; they’re a ticket to unlocking your inner charcuterie artist. They give you the freedom to unleash your creativity, experiment with flavors, and design a spread that resonates with your personal style.
Your Guide to Charcuterie Board Elegance
In this article, we’re on a mission to unravel the secrets of crafting a charcuterie board that not only tantalizes the taste buds but also showcases your artistic flair. We’ll walk you through the essential components that transform a simple assortment into a symphony of flavors, provide tips on arranging your board like a pro, and explore the captivating world of themed charcuterie presentations. Whether you’re hosting a casual get-together or a grand soirée, our insights will help you craft a charcuterie board that’s bound to steal the spotlight.
So, if you’re ready to embark on a culinary adventure that promises to dazzle, delight, and inspire, let’s dive into the art of creating the ultimate charcuterie board using DIY charcuterie board kits. Prepare to become the charcuterie virtuoso your guests will remember – and savor – long after the last crumb has vanished.
Must-Have Components for DIY Charcuterie Boards
Alright, buckle up, because we’re about to dive headfirst into the delicious realm of charcuterie board ingredients. It’s like curating your very own gallery of flavors and textures that not only tantalize the taste buds but also create a visual masterpiece that’s Instagram-worthy. And yes, you don’t need to be a culinary Picasso to nail this – all you need is a little guidance and a big appetite for creativity.
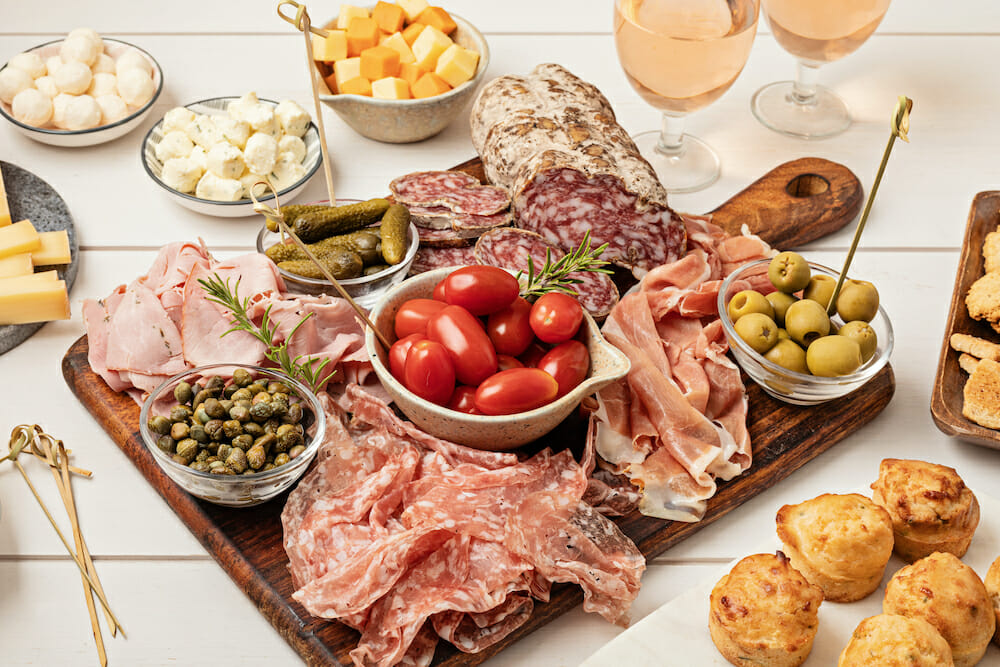
Cheese, Please!: Let’s talk about the VIPs of your charcuterie board – the cheeses. We’re talking creamy Brie that practically melts in your mouth, sharp Cheddar that’s the life of any party, and the rich elegance of Gouda. But here’s the secret sauce – variety is your best friend. Mix and match different cheese textures and flavors to keep things interesting. Think about it: the creamy meets the crumbly, the mild cozies up to the intense – it’s a cheese love story waiting to be written.
Cured to Perfection: Now, let’s add a touch of drama with cured meats. Prosciutto, that thin and oh-so-melty delight; the robust charm of salami; or even a smoky slice of chorizo. These meats bring depth and personality to your board, creating a symphony of tastes that harmonize with the cheeses like they were meant to be.
Nuts, Fruits, and All That Jazz: Time to throw in some curveballs in the form of nuts and dried fruits. Think almonds, walnuts, apricots, and figs – they add a delightful crunch and a touch of sweetness that makes every bite an adventure. Plus, they’re like little pops of color that make your board look like a work of edible art.
Crackers and Friends: Now, let’s give your guests something to scoop and stack all those delectable treats onto. Enter crackers – the trusty sidekicks that provide the perfect canvas for your charcuterie creations. But hey, don’t stop there. Think crusty baguette slices, rustic bread, or even gluten-free options to cater to everyone’s palate.
The Perfect Pairings: A Flavor Symphony
So, you’ve got the stars of the show – now, how about we bring them together in harmonious duets that will make your taste buds sing? Think about it: the creaminess of Brie with the zing of a fruity jam, or the sharpness of Cheddar with the earthy notes of walnuts. It’s all about those flavor combos that elevate each other to superstar status.
A Match Made in Flavor Heaven: Prosciutto with melon, a duo that’s like a sweet-and-savory love story. Or perhaps, a bite of Cheddar with a dab of honey – a combo that’s as classic as it is irresistible. These pairings aren’t just about taste; they’re about creating a symphony of flavors that dance on your tongue and leave you craving for more.
Remember, your charcuterie board is your canvas, and these ingredients are your colors. Mix, match, and get creative – there’s no right or wrong here, only palate-pleasing adventures waiting to unfold. And if you’re looking for inspiration, flip back to the introduction where we introduced DIY charcuterie board kits – they often come with a carefully curated assortment of ingredients that take the guesswork out of pairing.
So, there you have it – the essential ingredients that transform your board from a mere assortment to a masterpiece of flavors. Next up, we’ll dive into the art of presentation and how to arrange these goodies to create a jaw-dropping charcuterie spectacle that’ll have your guests reaching for seconds before you can say “bon appétit”!
What to Look For in a Kit
Pre-selected ingredients for convenience
When looking for the ideal kit, pay close attention to the assortment of gourmet ingredients it offers. There should always be a diverse mix of cheeses, cured meats, crackers, and accompaniments that work well together. To avoid disappointment, be sure to examine both online photos and product descriptions to confirm if food is included. There’s nothing more frustrating than expecting a comprehensive package and ending up with an incomplete set, leading to a last-minute dash to the store for costly items.
Clear and easy-to-follow assembly instructions
With most DIY kits in other markets, you’d typically expect to find clear and easy-to-follow assembly instructions. Regrettably, that’s not always the case with charcuterie. When choosing a kit, look for those that provide some sort of visual aids such as step-by-step videos.
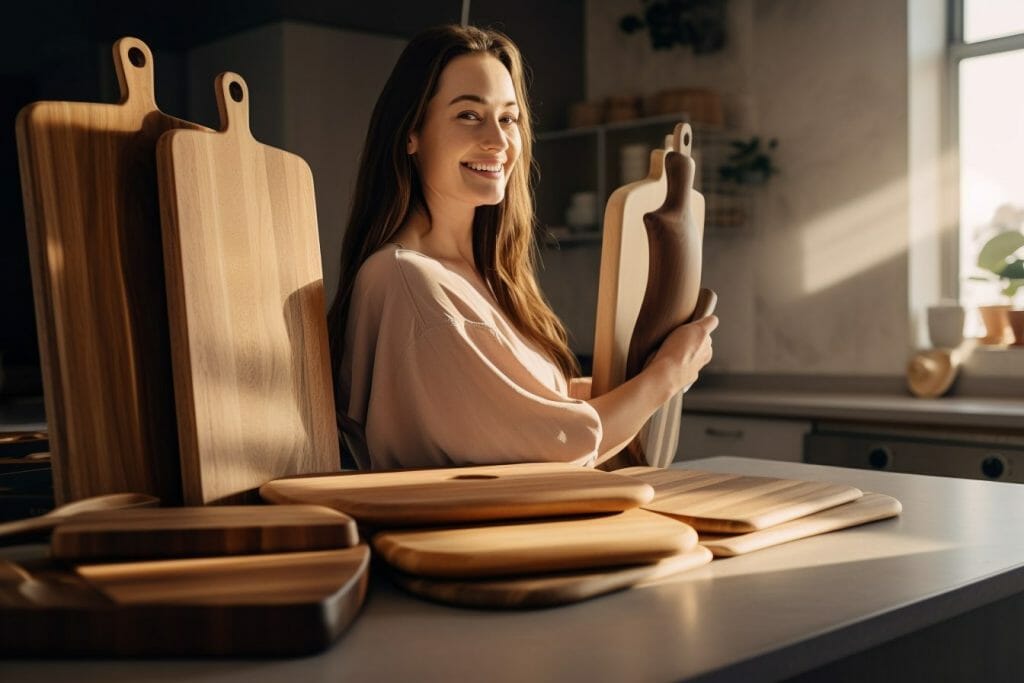
Serving board is included
What’s a charcuterie board without the board itself? A top-notch kit should provide a high-quality board that not only showcases your charcuterie artfully but also endures over time. While some kits may offer trays instead of boards, make sure to read the description to make sure that’s what you are looking for. Be cautious of lower-quality options like bamboo boards, as they may have a shorter lifespan.
Our Top Charcuterie Board Kit Picks
To help cut through the clutter, we’ve compiled a short list of some of the best and highly-rated DIY kits that do in fact include all of the things you need to make stunning charcuterie arrangements at home.
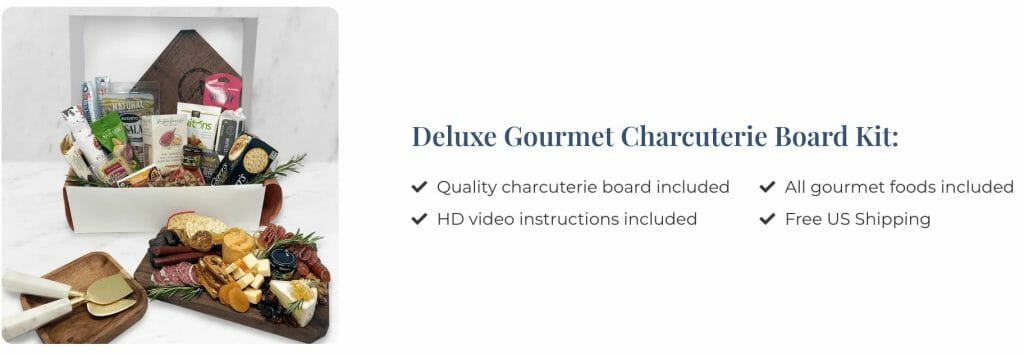
Deluxe Gourmet Charcuterie Board Kit:
Crafted with care in Chicagoland, every charcuterie kit is hand-packed by licensed and certified food handler. This kit offers an abundant selection of unsliced meats, unsliced cheeses, crackers, chocolates, and treats, providing you with everything required to arrange multiple appetizing displays. Also included is a perfectly sized charcuterie board made of walnut wood, that, when properly oiled, can retain its beauty and serve as a timeless piece for generations to come. Lastly, they provide direct asses to HD recordings of their popular, multi-camera charcuterie classes where the founder will teach you how to slice, fold and assemble your perfect board. Click to read more
Gourmet Charcuterie and Cheese Board Experience:
While not directly advertised as a charcuterie kit, this MASSIVE assortment has everything you need for delightful entertaining. This package includes serving bowls, an elegant tray (not a board), and an online tutorial teaching how to create the perfect arrangement. Enjoy curated cheeses like aged Manchego, Gouda, Chardonnay-infused, and Oregon Blue. Also included are premium salami options like Lomo Serrano, dry beef, sliced sopressata and much more. Click here to read more.

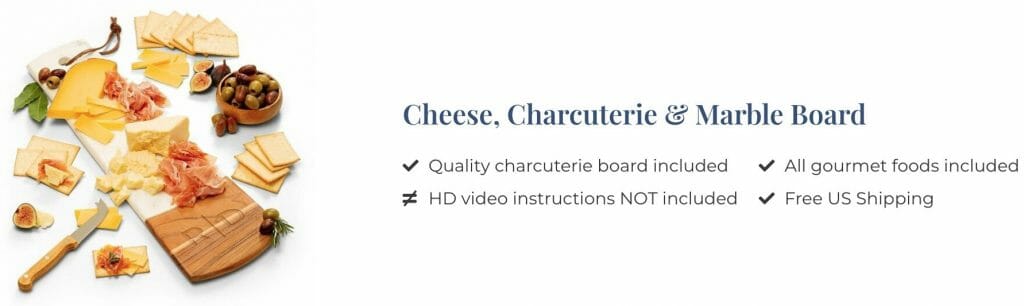
Cheese & Charcuterie Wood & Marble Board:
This package features two gourmet cheeses, salami, olives, and crackers, all beautifully presented. What’s more, this kit comes with an elegant wood and marble snack board with complimentary personalization! Some of the goodies are: aged flagship cheddar cheese, black pepper gouda cheese, and an array of accompaniments like prosciutto and crackers, all served with a stylish bamboo-handled cheese blade.. Click here to read more.
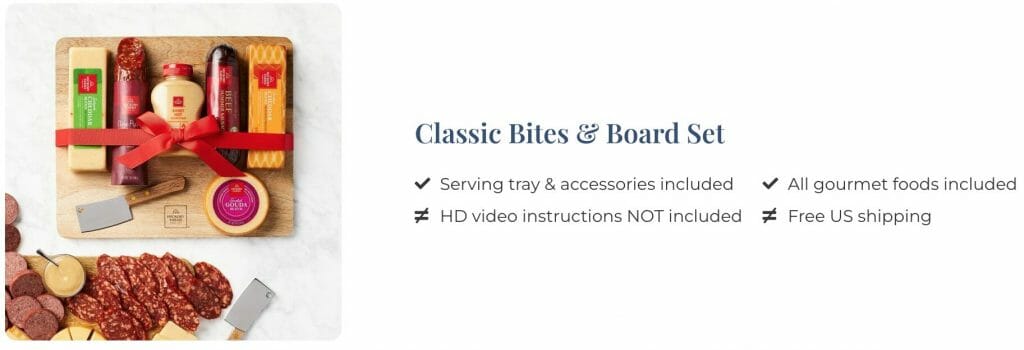
Classic Bites & Board Set:
Also not directly marketed as a kit, this affordable option comes with a mango wood cheese board and cheese cleaver. Featured flavors include: signature beef summer sausage, three pepper dry salami, jalapeño cheddar, smoked cheddar, smoked gouda and sweet hot mustard. Priced well below $100, this is very affordable kit. Click here to read more.
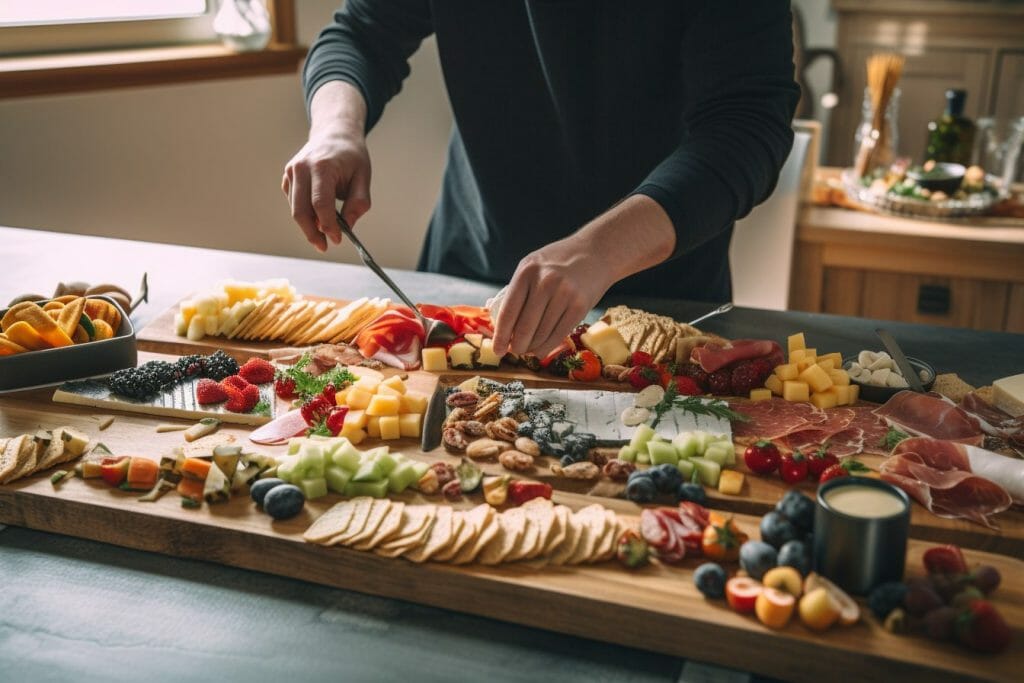
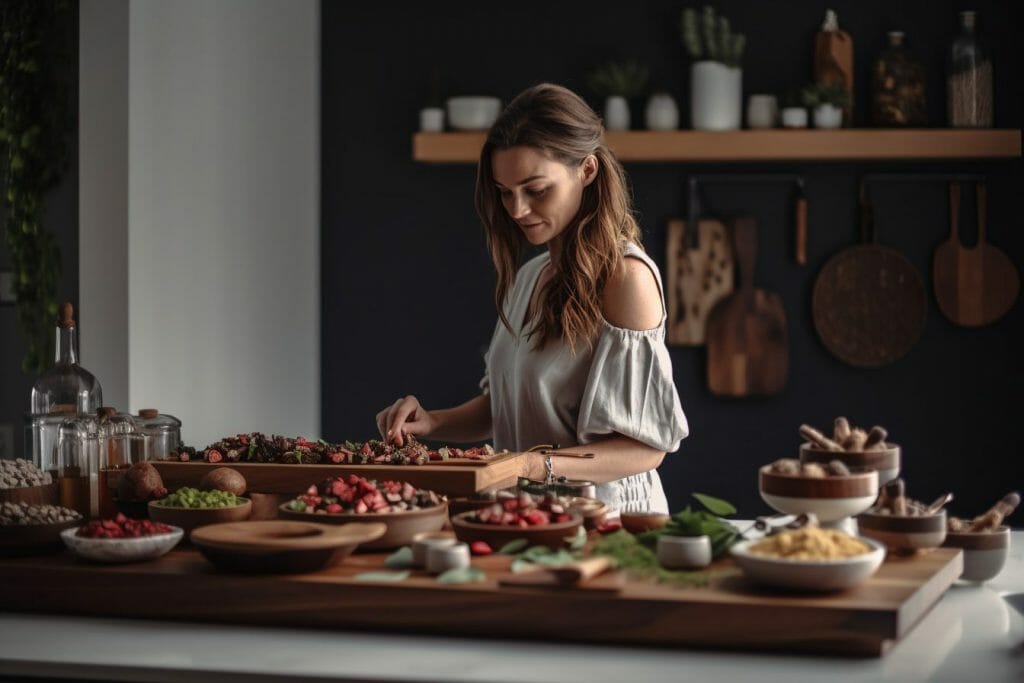
Step-by-Step Guide to Assembling Your DIY Charcuterie Board Kit

Unboxing and organizing your kit components
Before you dive into assembling your charcuterie board, take a moment to unbox and organize your kit components. Carefully unpack each item, ensuring that nothing is damaged or missing. Next, lay out your ingredients, serving board, and utensils in a clean, easily accessible workspace. By taking the time to properly organize your kit components, you’ll set yourself up for a smooth and enjoyable process.
Tips for following the provided assembly instructions
Most charcuterie board kits come with clear and easy-to-follow assembly instructions to guide you through the process. As you begin, read through the entire set of instructions to get a sense of the overall assembly flow. Then, follow each step carefully, paying close attention to the details and any recommended techniques. Don’t hesitate to reference the instructions as often as needed, and remember that practice makes perfect! Remember: every time you make another charcuterie board you’ll be getting better at it.
Techniques for creating a visually appealing presentation
A visually stunning presentation is one of the key elements of a successful charcuterie board. To achieve this, consider using the following techniques:
Color coordination: Arrange ingredients with contrasting colors next to each other to create a visually appealing and vibrant board.
Shape variety: Mix and match different shapes and sizes of ingredients, such as round cheeses, rectangular crackers, and sliced meats folded into interesting shapes.
Height variation: Add dimension to your board by using small bowls or ramekins for dips, spreads, and other accompaniments.
Grouping: Group similar items together, but also spread them out across the board to encourage guests to explore different sections.
Garnishing: Add a finishing touch with fresh herbs, edible flowers, or decorative picks for a polished and professional presentation.
Balancing flavors, textures, and colors
A well-balanced charcuterie board combines a variety of flavors, textures, and colors to create a harmonious and delightful experience for your guests. As you assemble your board, consider the following tips:
Flavor balance: Include a mix of sweet, salty, savory, and tangy ingredients to keep your guests’ taste buds engaged and excited.
Texture variety: Combine soft and creamy cheeses with crunchy crackers, crisp fruits, and velvety cured meats for a pleasing contrast in textures.
Color coordination: Choose ingredients with a range of colors to create a visually appealing and appetizing board. Incorporate fresh fruits, vegetables, and garnishes to add pops of color and brightness.
By focusing on these elements, you’ll create a charcuterie board that is not only a feast for the eyes but also a delightful journey of flavors and textures for your guests to enjoy.
Tips For Enhancing Your Display
While good charcuterie board kits provide fantastic starting points, they will often not include fresh fruits or vegetables because of the difficulty in shipping. That is why adding your own personal touch can truly elevate your creation.
While not required, if your goal is to knock your charcuterie out of the park, consider introducing unique ingredients that reflect your personality. Here are some additional suggestions:
Incorporating seasonal and regional elements
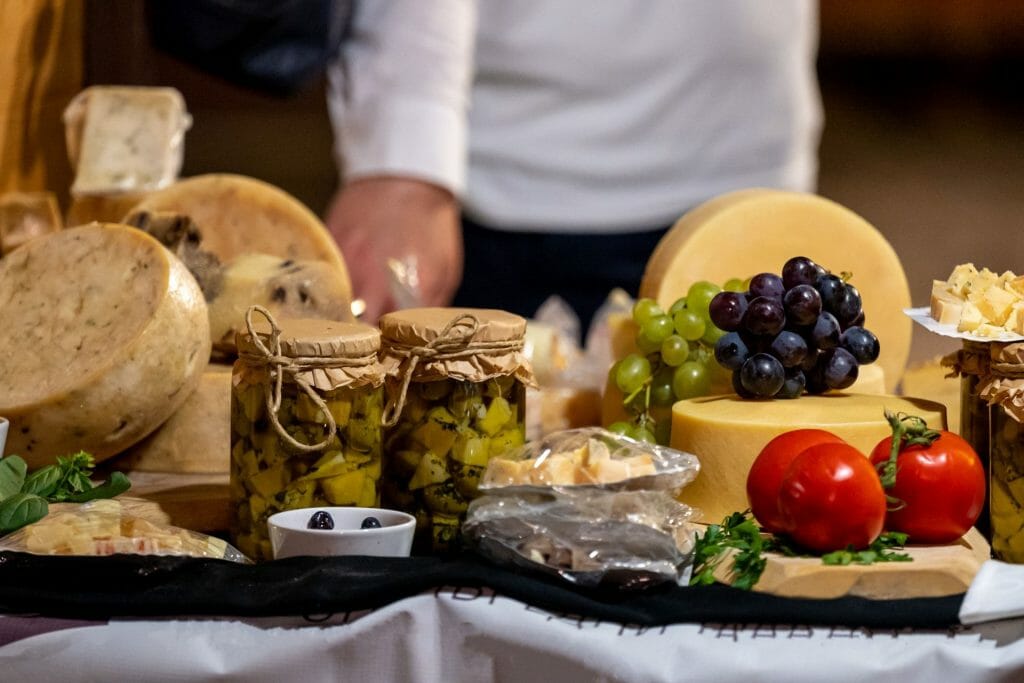
Another way to enhance your charcuterie board kit is by incorporating seasonal and regional elements. By using ingredients that are fresh and in-season, you’ll not only create a more flavorful board, but also support local producers and reduce your carbon footprint. Consider adding seasonal fruits, vegetables, and locally produced cheeses or meats to your board. This approach allows you to showcase the best that each season has to offer while also creating a unique and memorable experience for your guests.
Pairing your charcuterie board with beverages
No charcuterie board is complete without the perfect beverage pairing. By thoughtfully selecting drinks that complement the flavors and textures of your board, you’ll elevate the entire experience to new heights. Classic pairings include red or white wine, which can enhance the flavors of both the cheeses and cured meats. For a more adventurous option, consider pairing your board with craft beer or even artisanal cocktails. Non-alcoholic options such as sparkling water, iced tea, or a refreshing mocktail can also make a lovely accompaniment. Remember, the goal is to create a harmonious balance of flavors that allows each element of your charcuterie board to shine.
Caring for Your Charcuterie Board and Utensils
Proper cleaning and maintenance
Taking good care of your charcuterie board and utensils is essential for ensuring their longevity and maintaining a safe, hygienic environment for your food. After each use, gently wash your serving board with warm, soapy water and a soft sponge. Avoid soaking the board in water, as this can cause it to warp or crack. For wooden boards, periodically apply a food-safe mineral oil or beeswax to keep the wood moisturized and prevent drying or splitting. When it comes to utensils, follow the manufacturer’s guidelines for cleaning and maintenance, and always hand-wash any delicate or specialized items.
Tips for storing and reusing your serving board
Proper storage is key to preserving the life of your charcuterie board. Store your serving board in a cool, dry place, away from direct sunlight or heat sources, which can cause warping or discoloration. If possible, store your board upright to promote air circulation and prevent any moisture buildup. Additionally, avoid using the same board for raw meats and other ingredients to prevent cross-contamination. If you plan on reusing your serving board for multiple events, consider having designated boards for different types of food or occasions.
Ensuring food safety
Food safety should always be a priority when assembling and serving your charcuterie board. Make sure to wash your hands thoroughly before handling any food, and use clean utensils and surfaces for preparation. When selecting ingredients, check for any signs of spoilage or contamination and only use items within their expiration dates.
During your event, monitor the temperature of your charcuterie board and avoid leaving perishable items out for extended periods.
To be on the safe side, follow the two-hour rule: discard any perishable food that has been sitting out at room temperature for more than two hours. By adhering to these food safety practices, you’ll ensure that your charcuterie experience is both delicious and safe for everyone to enjoy.
Hosting with DIY Charcuterie Boards
Charcuterie Boards for Social Shindigs: The Ultimate Icebreaker
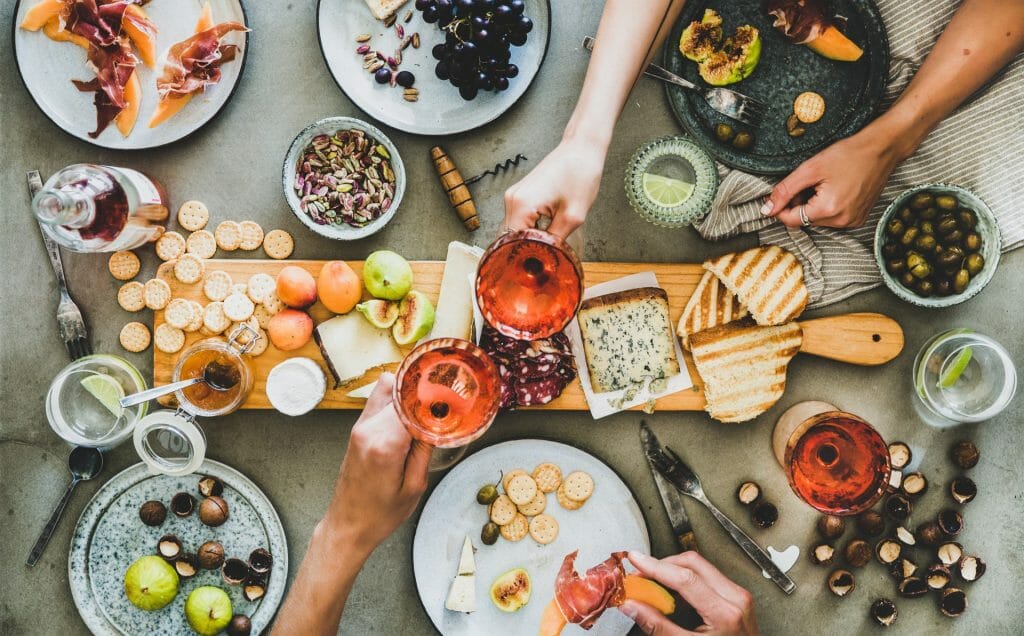
Here’s the scoop: when it comes to parties and gatherings, the centerpiece isn’t just the charcuterie board – it’s the conversations, the laughter, and the memories being shared around it. Enter the DIY charcuterie board, your trusty sidekick in the art of hosting. These boards aren’t just a feast for the taste buds; they’re a catalyst for connection, a culinary conversation starter that brings people together.
Picture this: a group of friends huddled around a beautifully curated charcuterie board, sharing stories about their favorite pairings, debating over which cheese reigns supreme, and reaching across each other for just one more slice of prosciutto. The board becomes more than just a spread; it becomes the heart of the gathering, an edible centerpiece that sets the tone for the entire event.
A Symphony of Flavors and Friendships: DIY charcuterie boards have this magical ability to break the ice and turn strangers into friends faster than you can say “Gouda.” As guests nibble on a variety of cheeses, meats, and accouterments, they naturally gravitate towards the board, sparking conversations and bonding over their newfound culinary discoveries.
Wow Your Guests: Crafting Charcuterie Board Spectacles
Now, let’s talk about wowing your guests with charcuterie board displays that are as elegant as they are enticing. The secret sauce here lies in the art of presentation – how you arrange your ingredients to create a visual masterpiece that’s almost too beautiful to eat. Almost.
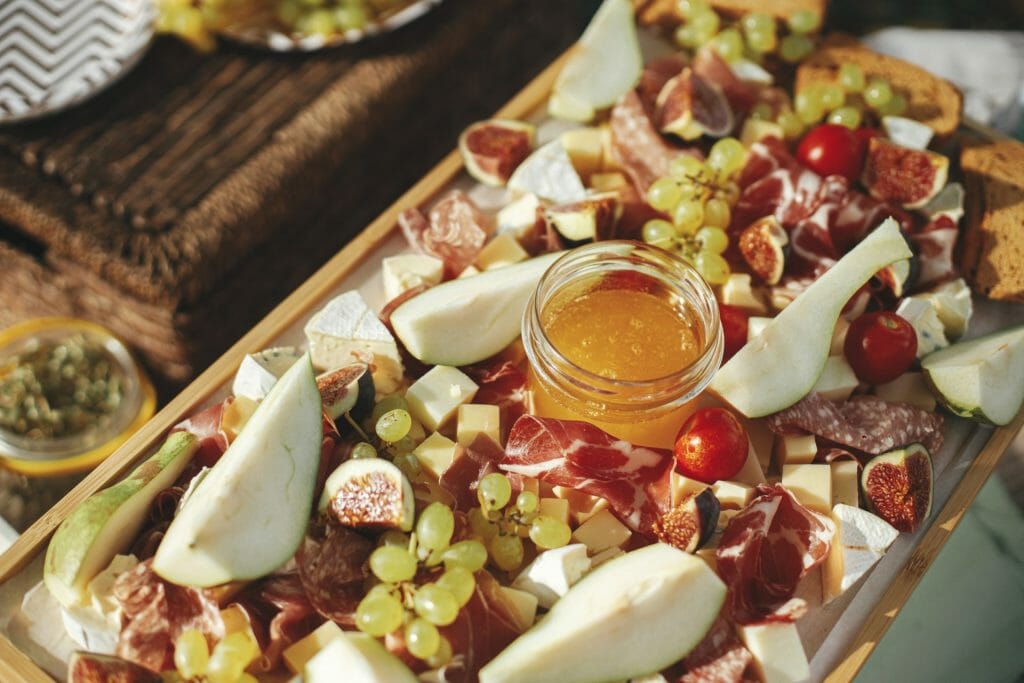
A Feast for the Eyes: Imagine a charcuterie board where each element is meticulously placed, where colors pop and textures intermingle like a gastronomic work of art. It’s not just about throwing ingredients on a board; it’s about curating an experience that ignites all the senses. Use cheeses as centerpieces, fan out meats like delicate petals, and scatter fruits and nuts like confetti.
Themes That Delight: Want to take your charcuterie board game up a notch? Consider crafting themed boards that match the occasion or season. From a romantic Valentine’s Day spread adorned with heart-shaped cheeses to a rustic autumnal board featuring the finest fall flavors, themed boards add an extra layer of intrigue and excitement.
DIY Charcuterie Board Kits: Your Party Arsenal
Remember those DIY charcuterie board kits we introduced earlier? Well, they’re not just for solo adventures – they’re your secret weapon for hosting too. These kits come with carefully selected ingredients and tools that simplify the process of creating an awe-inspiring charcuterie display. With the guesswork taken out of the equation, you can focus on what truly matters: being the star host or hostess who effortlessly crafts a spread that leaves guests raving.
So, whether you’re hosting an intimate get-together or a grand celebration, remember that the DIY charcuterie board isn’t just an appetizer; it’s a conversation starter, a memory maker, and an edible work of art that has the power to turn any gathering into a culinary extravaganza. Get ready to watch your guests marvel at your charcuterie prowess and savor every moment – one delightful bite at a time.
Answering Your Burning Questions About DIY Charcuterie Board Kits
As you step into the world of creating your very own charcuterie board masterpiece using DIY charcuterie board kits, it’s natural to have a few questions pop up. We’ve gathered some of the most frequently asked questions to give you all the insights you need to confidently craft your perfect spread.
1. How do I store leftover ingredients?
Don’t fret if you have some delicious remnants from your charcuterie board. Store cheeses in airtight containers or wrap them in parchment paper and place them in the fridge. Meats can be tightly sealed or wrapped, and nuts and fruits can go into resealable bags. Remember, proper storage keeps your ingredients fresh for your next charcuterie creation!
2. Are there any food safety tips to keep in mind?
Absolutely! When crafting your board, make sure to keep perishable items like cheese and meat at a safe temperature. If your gathering is outdoors, consider using ice packs or placing the board in the shade. And always use separate utensils for each ingredient to prevent cross-contamination.
3. How do I clean charcuterie boards and tools?
Cleaning up after the charcuterie magic is a breeze. Handwash your boards and utensils with warm, soapy water. Avoid immersing them in water for long periods to prevent warping. Once washed, let them air dry. Wooden boards benefit from occasional oiling with food-safe mineral oil to maintain their luster.
4. Can I prepare the board in advance?
Absolutely! You can prep your ingredients and arrange them on the board a few hours before your event. Cover the board with plastic wrap or place it in a large airtight container to keep everything fresh. Right before serving, add any perishable items like fruits to maintain their crispness.
5. Can I personalize a DIY charcuterie board kit?
Most certainly! Many DIY charcuterie board kits offer room for personalization. You can swap out ingredients, add extra garnishes, or even incorporate your own unique decorations to make the board truly yours. Personalization is part of the fun and creativity of charcuterie crafting!
Embrace the Charcuterie Adventure!
As you embark on your charcuterie journey, armed with the knowledge to store, serve, and clean up with finesse, you’re ready to impress your guests with not just a delicious feast but a memorable experience. Your DIY charcuterie board kits hold the key to culinary creativity and effortless elegance – so go ahead, craft your charcuterie masterpiece and revel in the joy of sharing delectable delights with your loved ones!
Wrapping It Up
And there you have it, fellow culinary adventurers – a journey through the world of DIY charcuterie board kits that’s as savory as it is sensational. From the mesmerizing variety of ingredients that adorn your board to the artful pairings that awaken the palate, you’ve uncovered the secrets to crafting a charcuterie masterpiece that’s more than just food; it’s an experience that brings people together.
Creating Memories, One Bite at a Time
With DIY charcuterie board kits by your side, you’re not just crafting a spread; you’re creating moments. Picture the smiles that light up faces as guests indulge in flavor combinations they’ve never imagined. Imagine the laughter, the stories, and the connections sparked around your thoughtfully curated board. It’s the embodiment of hospitality, the essence of sharing, and the heart of every gathering.
Unleash Your Charcuterie Artistry
But here’s the beauty of it all – you’re not just limited to what you’ve learned here. Charcuterie crafting is an art form where the canvas knows no bounds. Experiment with new flavors, explore themed boards that match the occasion, and let your creativity run wild. Swap cheeses, mix up your pairings, and infuse your board with your personal touch. The possibilities are as limitless as your imagination.
A Feast for the Senses and the Soul
As you embark on your next charcuterie adventure, remember that it’s not just about the ingredients, the tools, or the arrangements. It’s about the joy that comes from curating a feast that’s not just delicious but memorable. It’s about the anticipation that builds as you lay out each ingredient, the satisfaction of seeing your guests relish every bite, and the pride that swells when you realize you’ve created an edible masterpiece.
So, whether you’re celebrating a milestone, gathering friends for an evening of fun, or simply indulging in a solo culinary escapade, let your DIY charcuterie board be the catalyst for creating moments that linger long after the last morsel has been savored. Craft, share, and savor – because with each bite, you’re not just offering food; you’re offering a piece of your heart, a slice of your creativity, and a memory that’ll forever be etched in the tapestry of your shared experiences. Cheers to charcuterie brilliance and the journey of bringing people together, one beautiful board at a time.
People Also Asked
What is in a charcuterie board kit?
A charcuterie board kit typically includes a variety of pre-selected gourmet ingredients such as cured meats, cheeses, crackers, and accompaniments like fruits, nuts, and spreads. In addition, the kit may also contain a wooden serving board and utensils such as cheese knives and small forks. These kits are designed to provide everything needed for assembling and presenting a visually appealing and delicious charcuterie platter.
What should I buy for a beginner charcuterie board?
For a beginner charcuterie board, buy:
- Cured meats: salami, prosciutto, pepperoni
- Cheeses: brie, cheddar, gouda
- Crackers or crusty bread
- Accompaniments:
- Fresh or dried fruits
- Nuts
- Olives
- Spreads (hummus, mustard, fig jam)
- Wooden serving board
- Utensils: cheese knives, small forks
How do you make a charcuterie board at home?
To make a charcuterie board at home using a DIY charcuterie board kit:
- Gather the kit’s essential tools and utensils.
- Arrange a variety of cheeses, cured meats, nuts, fruits, and crackers on the board.
- Customize the presentation with your favorite garnishes and spreads.
- Enjoy a delightful and effortless charcuterie experience at home.
Tips: DIY charcuterie board kits offer convenience and pre-selected ingredients for easy assembly. Get creative with your board arrangement to impress your guests!
What to buy for DIY charcuterie board?
For a DIY charcuterie board, consider buying the following:
- DIY charcuterie board kit (includes tools and utensils).
- Assorted cheeses (e.g., Brie, Gouda, Cheddar).
- Cured meats (e.g., Prosciutto, Salami).
- Nuts, dried fruits, and fresh fruits.
- Crackers and bread.
- Olives and pickles.
- Jams, chutneys, and honey.
Tips: Choose a variety of ingredients to cater to different tastes. Ensure the DIY kit contains essential tools like cutting boards and cheese knives for easy assembly. Customize your board based on preferences and dietary needs.
What are 5 tips to making a charcuterie board?
Here are 5 tips to making a charcuterie board:
- Variety is Key: Include a diverse selection of cheeses, cured meats, fruits, nuts, and crackers for a balanced and enticing spread.
- Visual Appeal: Arrange ingredients in an eye-catching manner, using different shapes, colors, and textures to make the board visually appealing.
- Garnish and Accents: Add fresh herbs, edible flowers, or small bowls of condiments to enhance the presentation and flavors.
- Consider Dietary Preferences: Offer vegetarian or gluten-free options to cater to different dietary needs.
- Personal Touch: Customize the board with unique ingredients or themes to make it memorable and reflective of your style.
Tips: Experiment with different combinations and have fun while creating your charcuterie board! Also, consider using a DIY charcuterie board kit for added convenience and creativity.
How to build a charcuterie board on a budget?
To build a charcuterie board on a budget:
- Shop Smart: Look for deals and discounts on ingredients at local markets or bulk stores.
- Use Affordable Alternatives: Substitute expensive cheeses or meats with budget-friendly options.
- DIY Charcuterie Board Kit: Consider using a budget-friendly DIY charcuterie board kit for cost-effective convenience.
- Opt for Seasonal Produce: Choose fruits and vegetables that are in season, as they are often more affordable.
- Focus on Essentials: Stick to essential ingredients and avoid expensive gourmet items.
Tips: Creating a charcuterie board on a budget is about being resourceful and finding affordable yet delicious options. With a little planning, you can impress your guests without breaking the bank.
Share Your Creations:
We’d love to see the charcuterie boards you create using our guide! Feel free to share your own creations in the comments or on social media, and tag us for a chance to be featured. And if you have any other ideas or tips for creating the perfect charcuterie board, we’d love to hear them.


